25 Easy Pumpkin Carving Ideas and Stencils for Halloween
Halloween decorating does not have to involve complicated designs or hours of trying to make every pumpkin look perfect. Sometimes, a simple face, a playful pattern, or a classic Halloween shape is all you need to make your front porch feel festive. These 25 easy pumpkin carving ideas are perfect if you want pumpkins that look creative without requiring advanced carving skills.
Even if you are decorating with your family, preparing for a Halloween party, or simply looking for a fun weekend project, there is an idea here worth trying.
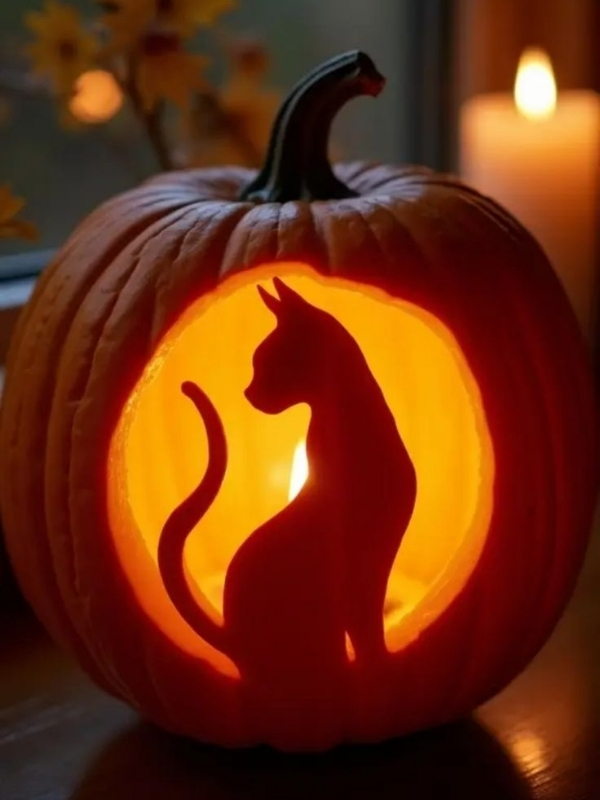
Pumpkin carving is also one of those traditions that makes the season feel more exciting. Once you have chosen your pumpkins, gathered your carving tools, and picked a stencil, the creative part can begin. You can keep things traditional with a smiling jack-o’-lantern, choose something cute for children, or try a more detailed design for a spooky porch display.
The best part is that you do not need to be an expert artist. A printed stencil can help you transfer a design, while simple shapes make cutting much easier. So, grab your pumpkins and get ready to turn them into charming Halloween decorations.
You may find helpful
40 Easy Thanksgiving Crafts for Kids and Adults to Make Together
30 Easy Popsicle Stick Craft Ideas for Kids and Adults to Make at Home
20 Valentine’s Day Crafts for Kids to Make at Home or School
DIY Father’s Day Photo Frame Crafts Kids Can Easily Make
25 Easy Pumpkin Carving Ideas and Stencils
1. Classic Jack-o’-Lantern Face
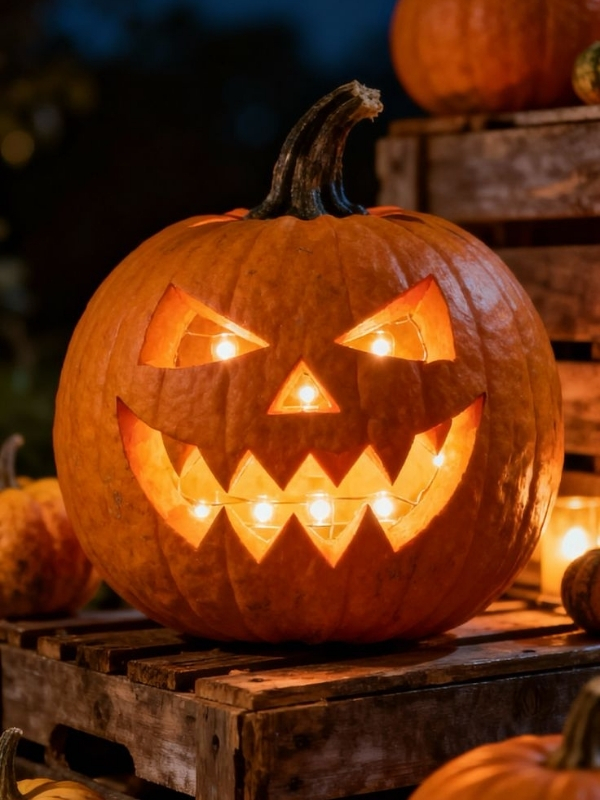
When you think about Halloween pumpkins, the classic jack-o’-lantern is probably the first design that comes to mind. It has triangle-shaped eyes, a small triangular nose, and a wide smiling mouth. Even though this design is traditional, it never feels boring.
This is one of the easiest choices from these 25 easy pumpkin carving ideas because the shapes are simple to draw and cut. You can sketch the face directly onto the pumpkin with a washable marker or use a basic jack-o’-lantern stencil.
For a friendly look, make the eyes slightly larger and give the mouth a wide smile. If you want something a little spookier, make the eyes narrower and add a few uneven teeth.
Place the finished pumpkin beside your front door, on the porch steps, or near other autumn decorations. You can also carve several pumpkins with different expressions and arrange them together.
A row of happy, surprised, and spooky faces can create a playful Halloween display without requiring complicated designs.
You might be looking for 10 Thanksgiving Desserts Other Than Pumpkin Pie and 15 Pumpkin Spice Dessert Recipes
2. Cute Smiling Pumpkin
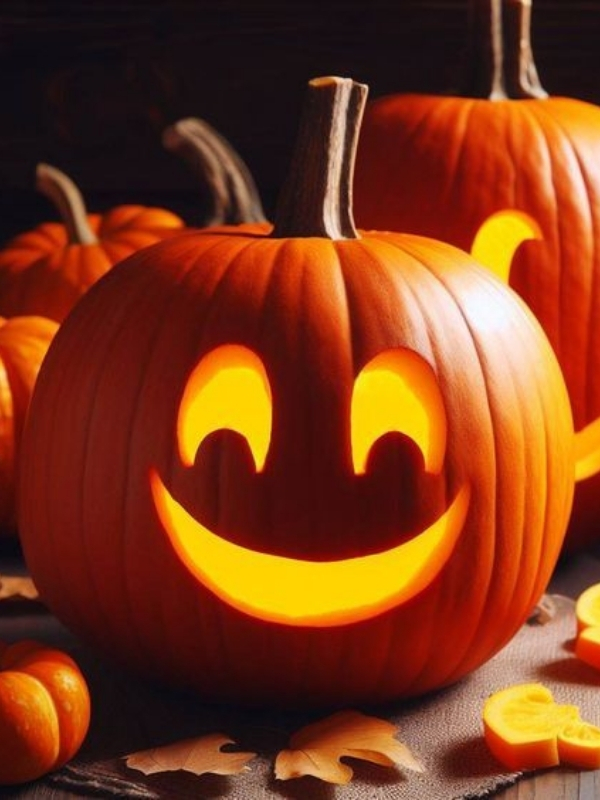
Not every Halloween pumpkin needs to look scary. A cute smiling pumpkin is perfect if you prefer cheerful decorations or want something children can enjoy.
For this design, start with two round or oval eyes. Add a small curved nose and a simple smiling mouth. You can make the cheeks round or add tiny dimples for an extra playful appearance.
Among these 25 easy pumpkin carving ideas, this one is especially useful for families because the design does not require many tiny cuts. The simple shapes are also easier to transfer from a stencil.
To make your pumpkin even more charming, place a small hat on top or tie a colorful ribbon around the stem. You could also surround it with mini pumpkins, artificial leaves, or a basket of fall decorations.
If you are decorating a porch, consider creating a little pumpkin family. Use different sizes and give each pumpkin its own expression. One can smile, another can look surprised, and another can have sleepy eyes.
The result will feel warm, playful, and perfect for a family-friendly Halloween display.
Check out our
10 Halloween Wedding Dress Ideas for a Spooky Yet Elegant Look
20 Halloween Costume Ideas for Black Women and Teenage Girls
20 Creative Tourist Halloween Costume Ideas for Adults and Couples
15 Eerie Halloween Chalkboard Ideas for Spooky Home Decor
3. Scary Triangle-Eyed Pumpkin
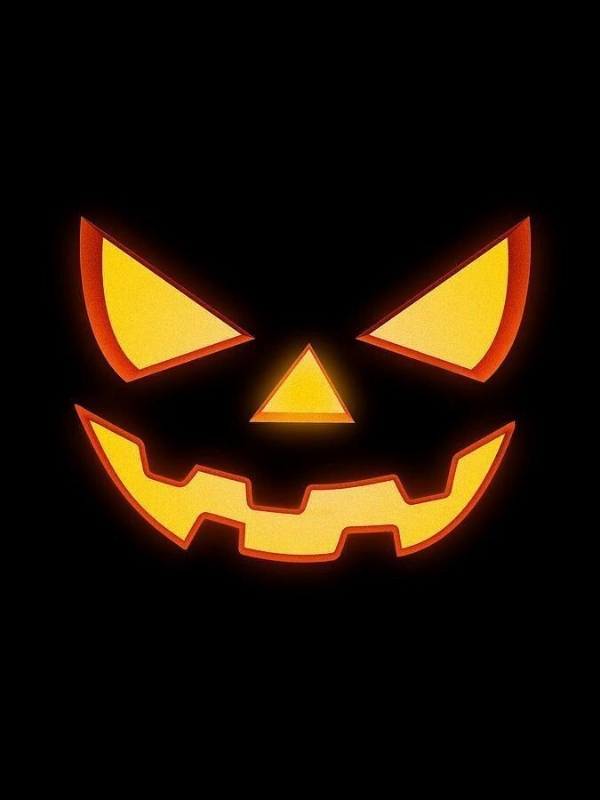
If you want something closer to the traditional spooky Halloween look, try a pumpkin with sharp triangle eyes and an exaggerated mouth.
The secret to making this design look frightening is not complicated carving. Instead, focus on the expression. Tilt the eyes slightly inward and give the mouth an uneven row of teeth.
This design fits beautifully among these 25 easy pumpkin carving ideas because you can create it with basic geometric shapes. A stencil can make the process even easier if you want symmetrical eyes.
Before cutting, trace your design carefully and make sure there is enough space between each shape. Once the pieces are removed, place a small battery-powered light inside the pumpkin.
The glow will highlight the sharp edges and make the expression stand out after dark.
For a dramatic porch display, place the scary pumpkin beside a few smaller pumpkins with simpler faces. Mixing different expressions keeps the arrangement interesting.
You can also use pumpkins in different shapes and sizes to create a haunted pumpkin family that looks great near your front steps.
4. Ghost Pumpkin Stencil
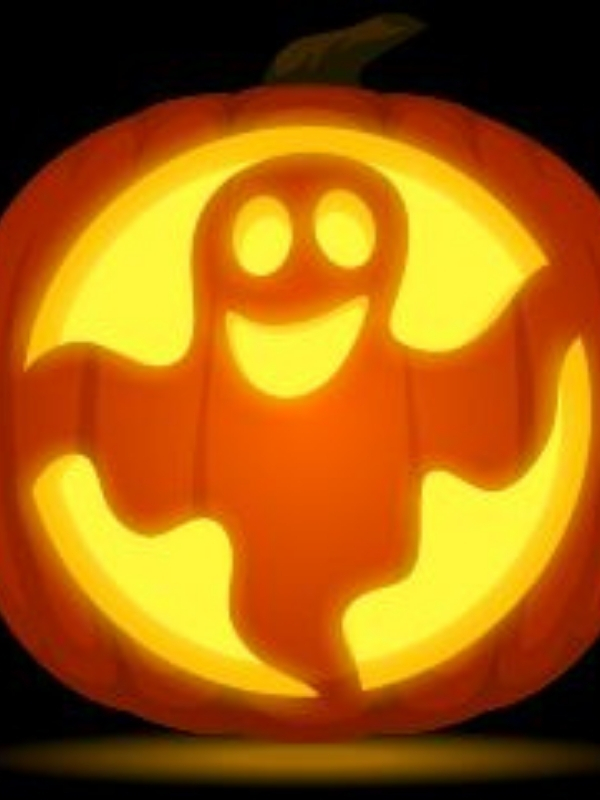
A ghost-shaped pumpkin combines two classic Halloween symbols in one decoration. Instead of carving a traditional face, use a ghost stencil to create a simple floating figure.
Look for a stencil with a rounded head, flowing body, and small eyes. You can keep the design simple by carving only the outline and facial features.
This is another fun choice among these 25 easy pumpkin carving ideas because the ghost shape can be adapted to different pumpkin sizes. A larger pumpkin gives you more room for a detailed ghost, while a small pumpkin can feature a tiny, simple version.
Once carved, place a light inside and watch the ghost glow against the darker evening sky.
For an extra creative display, arrange several pumpkins together and give each one a different ghost expression. You can also add small artificial bats, cotton cobwebs, or autumn leaves around the base.
If you are decorating with children, let them choose whether their ghost should look happy, surprised, or slightly spooky.
The design is simple enough to recreate while still giving your Halloween porch a distinctive seasonal touch.
Save for later
DIY Rock Picture Frame Craft for Father’s Day
20 Creative Father’s Day Crafts to Make with Your Kids
Creative 4th of July Activities for Kids and Adults (Games, Crafts & More)
5. Cat Face Pumpkin
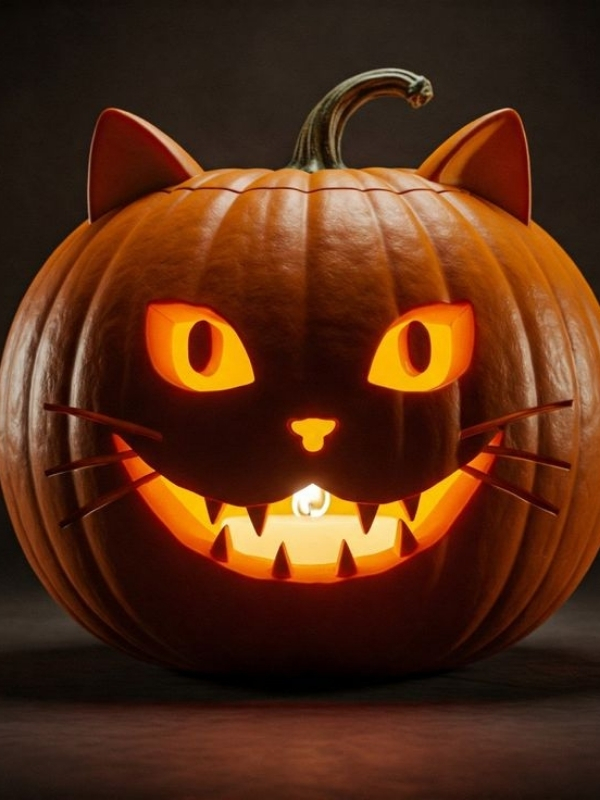
Cat lovers can turn an ordinary pumpkin into an adorable Halloween cat with a few simple cuts.
Start with two pointed ears near the top of the pumpkin. Then add narrow eyes, a small triangular nose, and a curved mouth. A few thin lines can represent whiskers.
This idea works especially well with these 25 easy pumpkin carving designs because the basic cat face can be made using simple shapes. You do not need to carve every whisker. Instead, you can draw them with a washable marker if you prefer.
For a classic Halloween appearance, use a black cat theme around the pumpkin. Black ribbons, faux spiderwebs, and small bats can complete the display.
You can also create several cat pumpkins using different expressions. One could have sleepy eyes, while another looks surprised.
Place your finished cat pumpkin near your doorway or on a porch table. If you have several pumpkins, arrange the cat beside a traditional jack-o’-lantern for a playful contrast.
The result is festive without being overly frightening.
Bookmark these posts
10 Halloween Wedding Dress Ideas for a Spooky Yet Elegant Look
20 Halloween Costume Ideas for Black Women and Teenage Girls
20 Creative Tourist Halloween Costume Ideas for Adults and Couples
17 Smart and Spooky Halloween Costume Ideas for Teachers at School
6. Witch Hat Pumpkin
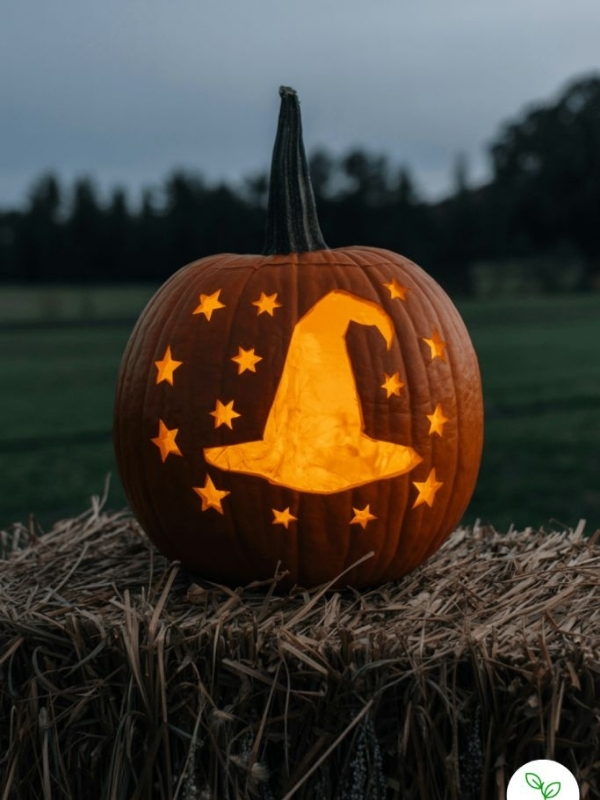
A witch-inspired pumpkin can make a charming addition to your Halloween decorations. Instead of carving an entire witch, focus on the most recognizable part of the costume: the pointed hat.
You can carve a simple witch hat silhouette onto the front of the pumpkin. Use a stencil to create a pointed top and wide brim.
This is one of the most creative options in these 25 easy pumpkin carving ideas because the design can remain simple while still looking distinctly Halloween-themed.
For a more detailed appearance, add stars, a buckle, or small dots to the hat. You could also combine the hat with a traditional pumpkin face underneath.
Another option is to use a smaller pumpkin as the base and place a decorative witch hat directly on top. This avoids complicated carving while still creating a fun centerpiece.
Surround the pumpkin with faux leaves, black lanterns, or miniature broom decorations. The combination will look especially lovely on a front porch.
If you want a more whimsical style, choose a friendly witch design rather than a frightening one. It is a simple way to make your Halloween decorations feel welcoming.
7. Spiderweb Pumpkin
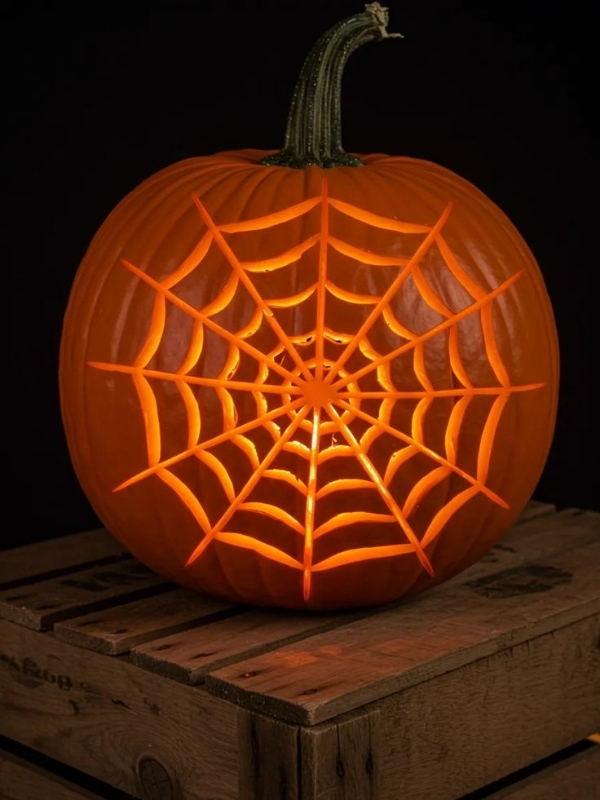
A spiderweb pumpkin is perfect if you want something decorative instead of a traditional jack-o’-lantern face.
For this design, draw several curved lines extending from the center of the pumpkin. Connect them with smaller curved lines to create the web.
Among these 25 easy pumpkin carving ideas, the spiderweb design is a great option for people who want a more elegant Halloween decoration. The pattern can look beautiful when illuminated from inside.
You do not need to carve every tiny section deeply. Carefully removing the outer layer of the pumpkin in selected areas can also create a glowing pattern.
Add a small spider shape near the web for extra Halloween character. If you are not comfortable carving a detailed spider, use a small decorative spider instead.
Place the pumpkin on a table, porch bench, or entryway display. Pair it with white pumpkins, black candles, or autumn foliage for a more sophisticated arrangement.
A spiderweb pumpkin can also work well for Halloween parties because it feels festive without being too frightening.
8. Crescent Moon Pumpkin
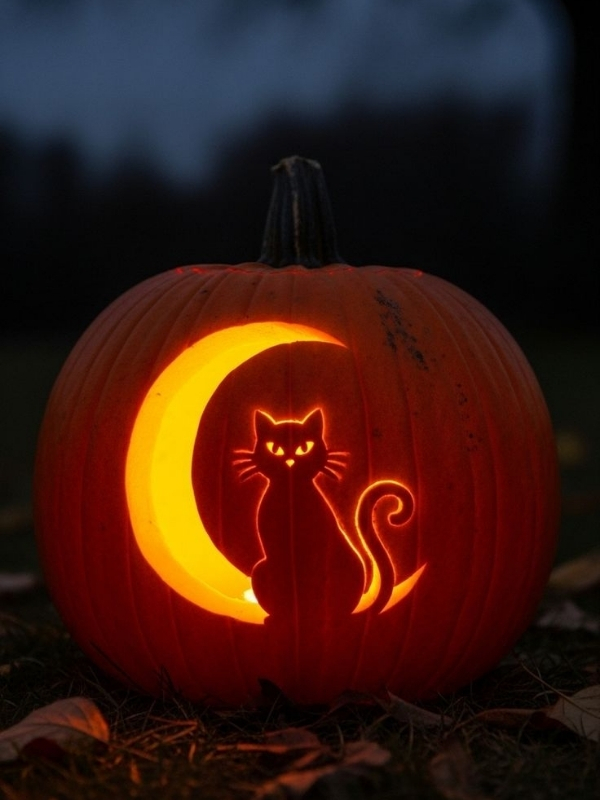
A crescent moon design gives your Halloween pumpkin a magical nighttime feeling. It is especially beautiful when the pumpkin is illuminated after sunset.
Start by tracing a large crescent moon on one side of the pumpkin. You can leave the design by itself or surround it with small stars.
This is a lovely option among these 25 easy pumpkin carving ideas because the shapes are uncomplicated. A simple moon stencil can help you achieve clean edges.
For a celestial display, add several tiny stars around the moon. You can use dots, small diamonds, or simple four-point stars.
Once the pumpkin is finished, place a warm battery-operated light inside. The glow will make the moon shape stand out beautifully.
This design works particularly well with neutral autumn décor. Pair the pumpkin with cream-colored pumpkins, dried flowers, pinecones, and natural foliage.
If you prefer a spooky theme, add a small bat silhouette near the moon. For a softer look, leave the bat out and focus on the stars.
It is an easy design that feels different from the usual jack-o’-lantern.
You may also find helpful
Cute Halloween Costume Ideas For Couples And Kids (Family Matching Costume)
30 Halloween Nail Ideas to Try This Spooky Season
15 Halloween Wedding Food Ideas for a Spooky Reception
15 Spooky Halloween Date Night Ideas at Home
9. Pumpkin with BOO Lettering
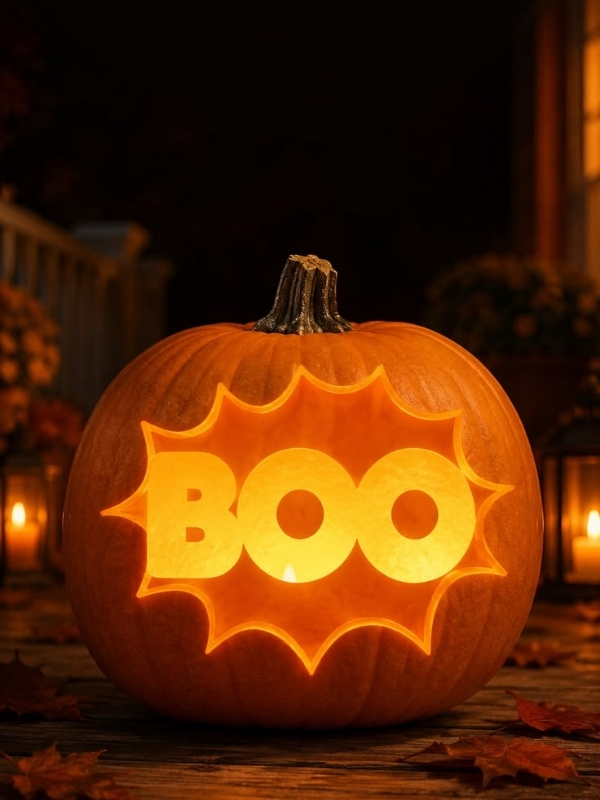
Sometimes you do not need a face at all. Large Halloween lettering can turn a plain pumpkin into a fun seasonal decoration.
The word “BOO” is particularly easy because the letters are short and recognizable. Draw the letters across the front of the pumpkin using a stencil or printed template.
This idea fits naturally into these 25 easy pumpkin carving ideas because it allows you to personalize your pumpkin without creating a complicated image.
Choose thick letters rather than thin fonts. Wider shapes are easier to cut and are less likely to break during carving.
You can also make each letter slightly different. For example, use a normal B, a playful O, and another O with tiny eyes inside.
Arrange several pumpkins together and give each one a different Halloween word. Try “BOO,” “EEK,” or “HEY.”
For a porch display, place the pumpkins at different heights. A wooden crate or small stool can help create visual variety.
You can also paint the letters instead of carving them if you want a decoration that lasts longer. Either way, bold Halloween lettering is simple, recognizable, and easy to customize.
10. Friendly Ghost Face
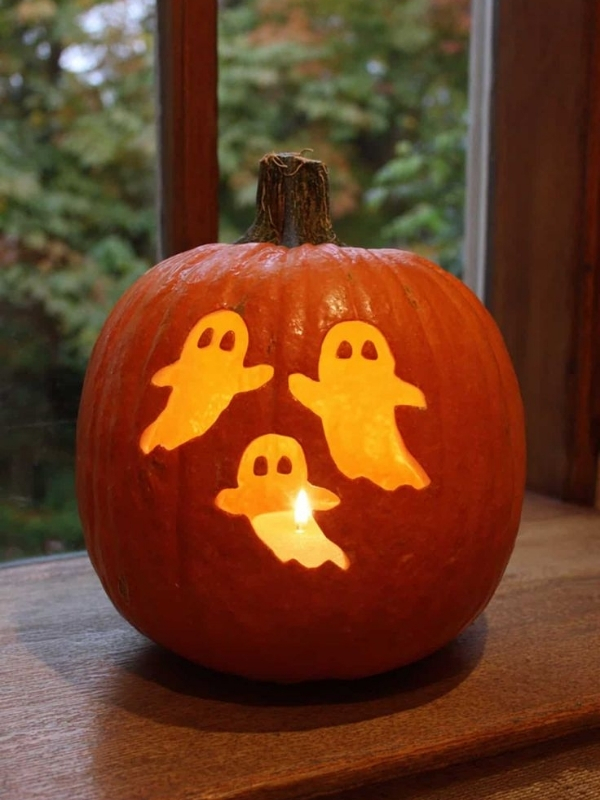
A friendly ghost face is another wonderful option if you want a Halloween decoration that feels cute rather than scary.
Start with two large oval eyes and a small open mouth. Keep the shapes rounded and avoid sharp edges to create a softer expression.
This design is one of these 25 easy pumpkin carving choices that works particularly well for children’s Halloween decorations. The face is simple enough to draw without an advanced stencil.
For a more playful look, make one eye slightly larger than the other. You can also create a surprised expression by making the mouth round.
Place the finished pumpkin beside a white pumpkin or a small ghost decoration. The combination can create a charming Halloween corner.
If you want your display to stand out at night, place a small battery-powered light inside the pumpkin. The bright glow will make the face easy to see from a distance.
You can also create several ghost pumpkins in different sizes. Give each one a unique expression so the display feels handmade rather than repetitive.
This is an easy project for a relaxed Halloween afternoon.
Save these posts for later
10 Non-Scary Halloween Decor Ideas
10 Outdoor Halloween Decorations on a Budget
Halloween Make-up for Beginners: Easy Spooky Looks
20 Halloween Treats for Classroom Parties
Cute Halloween Costume Ideas For Couples And Kids (Family Matching Costume)
11. Bat Silhouette Pumpkin
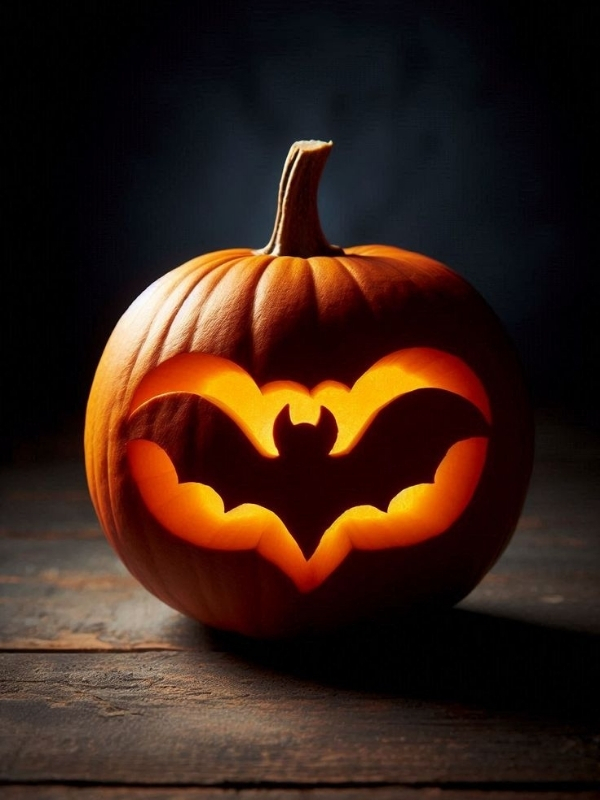
A bat silhouette brings instant Halloween atmosphere to a pumpkin without requiring a complicated facial design.
Choose a simple bat stencil with wide wings and a small body. Place it toward the center of the pumpkin and trace the shape carefully.
This design works well within these 25 easy pumpkin carving ideas because the silhouette can be adjusted to fit almost any pumpkin.
If you want a single dramatic bat, make the shape large. For a busier design, use several small bats flying across the pumpkin.
You can also combine the bat with a crescent moon. Carve the moon on one25 Easy Pumpkin Carving Ideas and Stencils for Halloween side and place two or three bats around it.
When the pumpkin is illuminated, the silhouettes will create a striking effect.
For a full Halloween display, arrange the pumpkin beside black lanterns, faux cobwebs, and autumn leaves.
A bat pumpkin can look spooky without being overly frightening, which makes it suitable for many different decorating styles.
The simplicity also makes it a good choice when you want a design that looks impressive without spending the entire afternoon carving tiny details.
12. Simple Heart Pumpkin
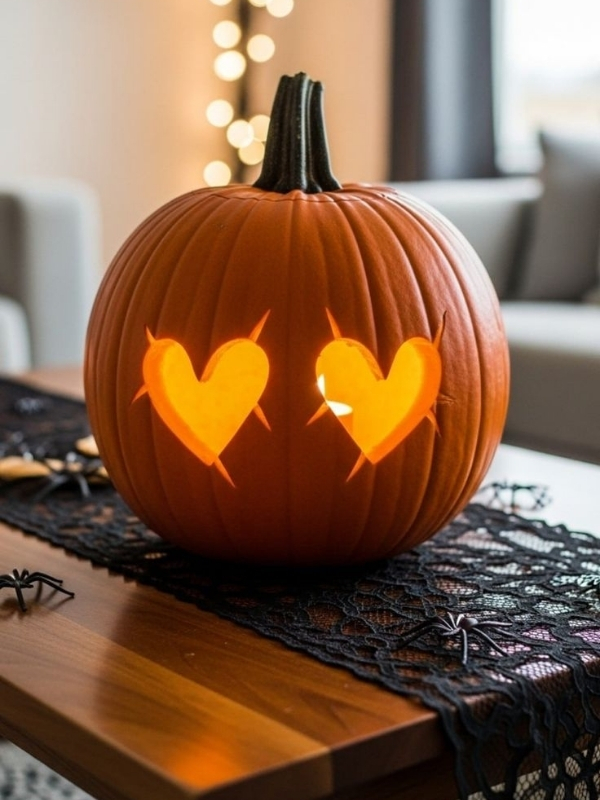
Halloween decorations do not always have to be scary. A heart-shaped pumpkin can add a sweet touch to your seasonal display.
For this design, trace one large heart in the center of the pumpkin. You can stop there or add several smaller hearts around it.
This is one of the most unusual ideas among these 25 easy pumpkin carving options because the shape feels different from traditional Halloween designs.
You can make the heart symmetrical or choose a slightly playful shape. A simple stencil can help you get clean edges.
For a cozy autumn display, pair the heart pumpkin with white pumpkins, dried flowers, plaid fabric, and warm-toned leaves.
You could also use the design for a Halloween party centerpiece. Place the carved pumpkin on a tray and surround it with small seasonal decorations.
If you want a more Halloween-specific look, add tiny bats or stars around the heart.
The result is cheerful, simple, and easy to personalize.
This design is also useful if you want your pumpkin decoration to transition from Halloween into a general fall display. The heart shape can remain attractive even after the spooky decorations are put away.
13. Scalloped Pumpkin Design
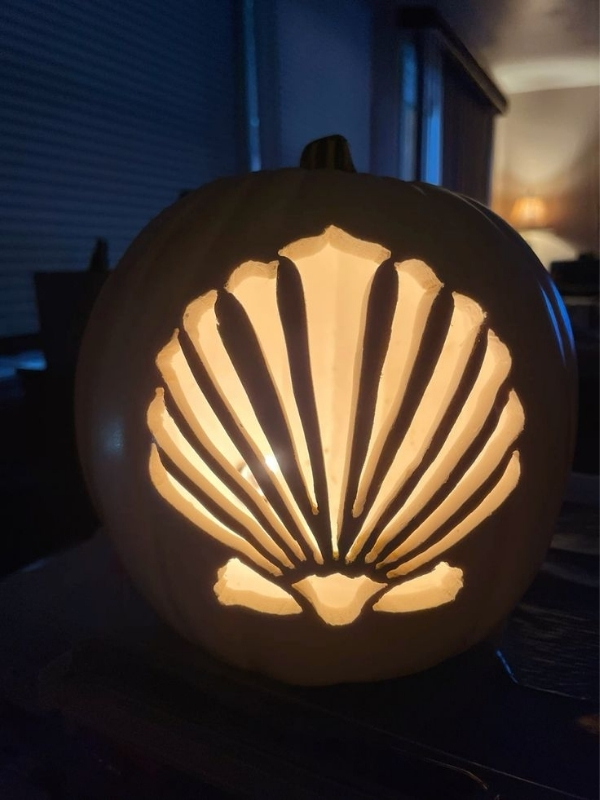
If you want a decorative pumpkin without a recognizable character, try a scalloped pattern.
Create a repeating row of rounded shapes around the pumpkin. The pattern can resemble petals, clouds, or small arches depending on how you draw it.
This design is a beautiful addition to these 25 easy pumpkin carving ideas because it feels decorative and slightly more sophisticated than a basic face.
You can carve the shapes completely through the pumpkin or simply scrape away the outer skin. The second method creates a softer glow.
Try repeating the pattern around the center of the pumpkin while leaving the top and bottom untouched.
Once illuminated, the repeating shapes can create a beautiful pattern of light.
This style works particularly well for autumn tables, porch benches, and entryway displays. Pair it with natural materials such as pinecones, dried leaves, wooden trays, and small gourds.
If you are making several pumpkins, use a different pattern on each one. One could have scallops, another could have dots, and another could have stars.
The collection will feel coordinated while still giving every pumpkin its own personality.
14. Star Pattern Pumpkin
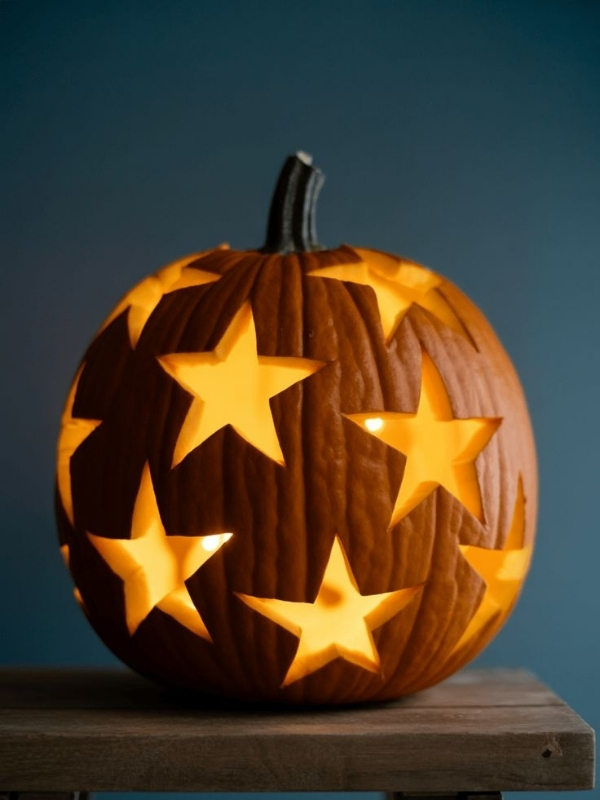
Stars are another easy shape that can transform an ordinary pumpkin into a glowing Halloween decoration.
You can create one large star in the center or cover the pumpkin with stars of different sizes.
This idea works beautifully among these 25 easy pumpkin carving designs because stars are easy to draw and cut. You can also find simple star stencils that make the process even quicker.
For a more interesting design, arrange the stars so they appear to move across the pumpkin. Start with larger stars in the middle and use smaller ones near the edges.
After carving, place a small light inside. The stars will glow against the pumpkin’s orange surface.
You can combine this design with a crescent moon for a nighttime theme. Add a few bats if you want a stronger Halloween feeling.
For a softer autumn display, keep the pumpkin surrounded by neutral decorations instead.
Star pumpkins look lovely grouped together, especially when you use different pumpkin sizes. Place the largest pumpkin at the back and smaller ones in front.
The arrangement can become a simple centerpiece for your porch or dining table.
15. Funny Surprised Pumpkin
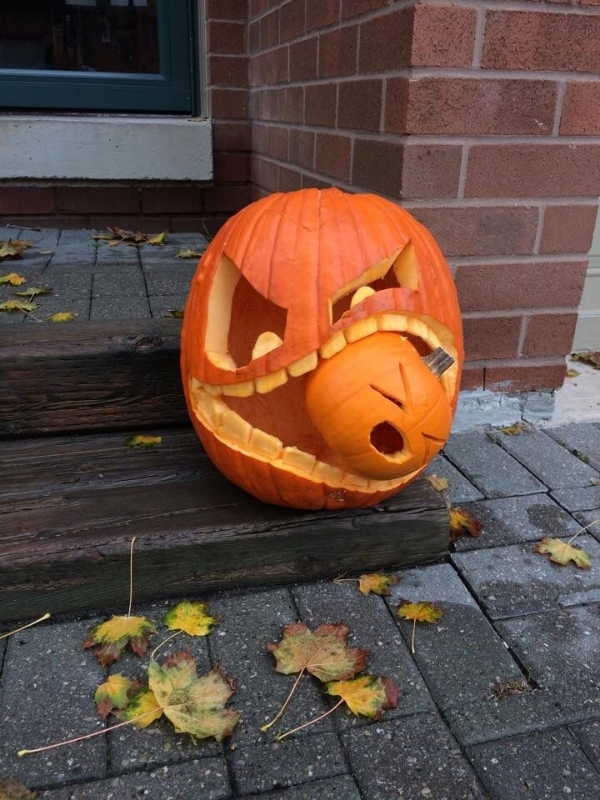
A surprised pumpkin can bring a little humor to your Halloween decorations.
Use large round eyes and a wide oval mouth to create the expression. You can make the eyes uneven to make the pumpkin look even more amusing.
Among these 25 easy pumpkin carving ideas, this one is perfect for families because it feels playful rather than frightening.
You can also add two small eyebrows above the eyes. Raising one eyebrow can give the pumpkin an exaggerated expression.
If you are making multiple pumpkins, create different emotions. One can look surprised, another can look happy, and another can look confused.
This makes the display feel like a little pumpkin conversation.
Place the pumpkins on different levels using crates, baskets, or small stools. Add autumn leaves and mini gourds around them to complete the arrangement.
For an evening display, use battery-powered lights inside each pumpkin.
The surprised face will look especially funny when the pumpkin lights up after dark.
Because the design uses basic shapes, you can sketch it quickly without relying on a complicated stencil. However, a simple facial stencil can still help younger children get the proportions right.
16. Leaf-Carved Pumpkin
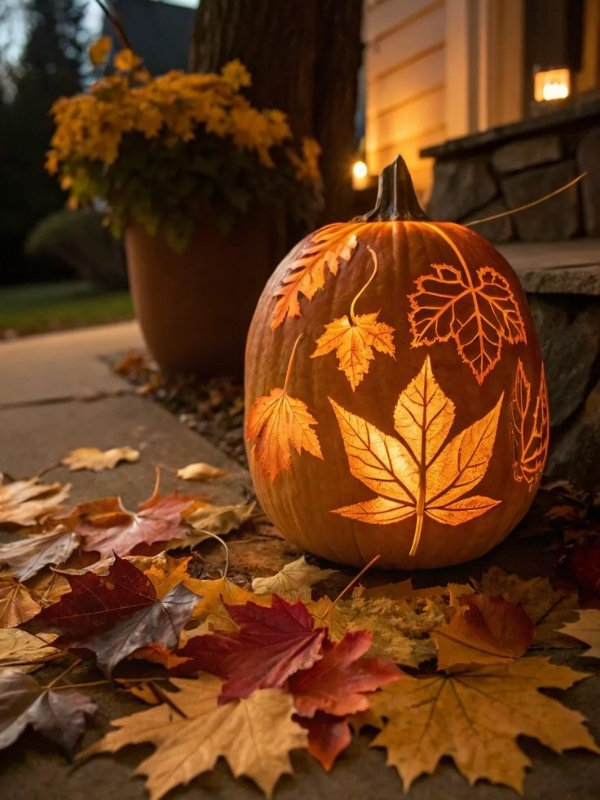
Bring a little autumn beauty to your Halloween decorations with a pumpkin covered in leaf shapes.
Choose simple maple, oak, or generic leaf silhouettes. You can carve one large leaf or create a repeating pattern.
This idea fits well with these 25 easy pumpkin carving ideas because the shapes can be as simple or detailed as you want.
If you prefer an easier design, use basic leaf outlines instead of trying to recreate every vein. The pumpkin will still look beautiful when illuminated.
A leaf pumpkin works especially well when Halloween decorations overlap with general fall decorating.
Place it beside pinecones, dried leaves, small gourds, and a cozy basket. The combination will feel seasonal without being overly spooky.
You can also use several pumpkins with different leaf shapes. Choose one large pumpkin for the main design and smaller pumpkins with single leaves.
If you want a little Halloween character, add one tiny spider crawling across a leaf.
This design is especially useful for people who want their decorations to remain attractive throughout the fall season.
The natural pattern feels warm, simple, and easy to recreate.
17. Pumpkin with a Simple Spider
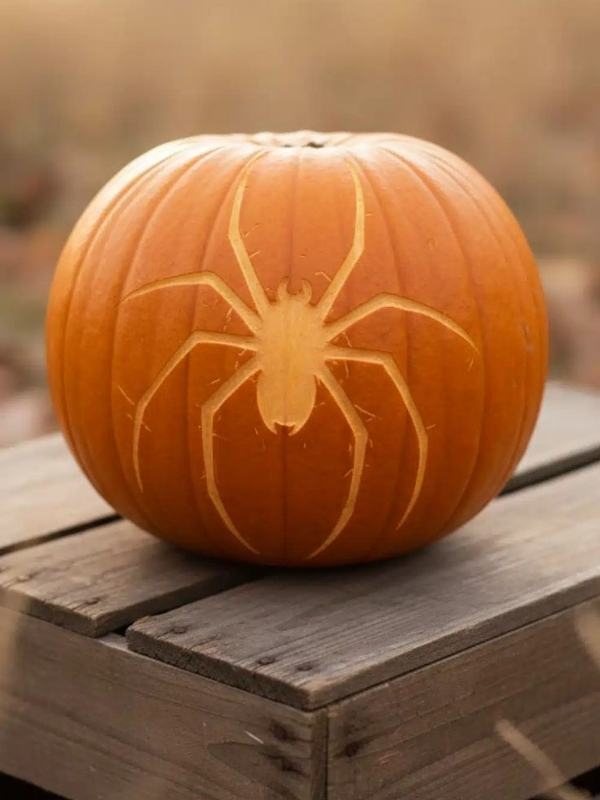
A spider design can make an ordinary pumpkin instantly feel more Halloween-ready.
Use a simple spider stencil with a round body and several curved legs. Avoid extremely thin legs because they can be harder to carve cleanly.
This is one of the more playful choices among these 25 easy pumpkin carving ideas. You can make the spider large and dramatic or create several small spiders across the pumpkin.
For an even easier version, carve one large spider in the middle and surround it with a few small dots representing its web.
Place a battery-powered light inside the pumpkin once you finish.
The glow will highlight the spider silhouette and make the design visible after dark.
If you are creating a Halloween porch display, place the spider pumpkin beside a pumpkin with a spiderweb design. The two designs will complement each other without looking identical.
You can also add faux cobweb material around the base of the display.
For a family-friendly version, give the spider a cheerful expression instead of making it frightening.
The flexibility makes this design useful for both spooky and playful Halloween themes.
18. Candy Corn Pumpkin
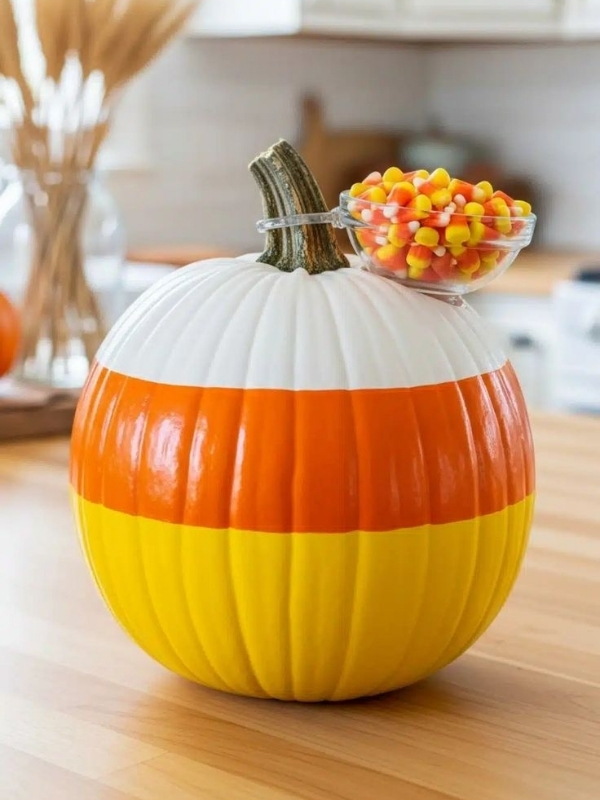
Candy corn is one of the most recognizable Halloween treats, so why not turn it into a pumpkin design?
Instead of carving a complicated picture, create a large candy corn shape or several small candy corn silhouettes across the pumpkin.
This colorful theme adds variety to these 25 easy pumpkin carving ideas and works especially well when you want something cheerful.
You can use a stencil to keep the shapes consistent. If you are confident with a marker, draw simple triangular forms directly onto the pumpkin.
For an easier option, carve the outlines and leave the inner sections intact.
You can also paint the candy corn shapes in white, orange, and yellow instead of carving them. This is useful if you want the pumpkin to last longer.
Place the finished pumpkin near a bowl of Halloween candy or a seasonal snack table.
For a porch display, pair it with traditional orange pumpkins and small white gourds.
The result will feel playful, colorful, and unmistakably Halloween-inspired.
This design is particularly fun for families because everyone can choose a different candy corn pattern to create.
19. Moon and Stars Pumpkin
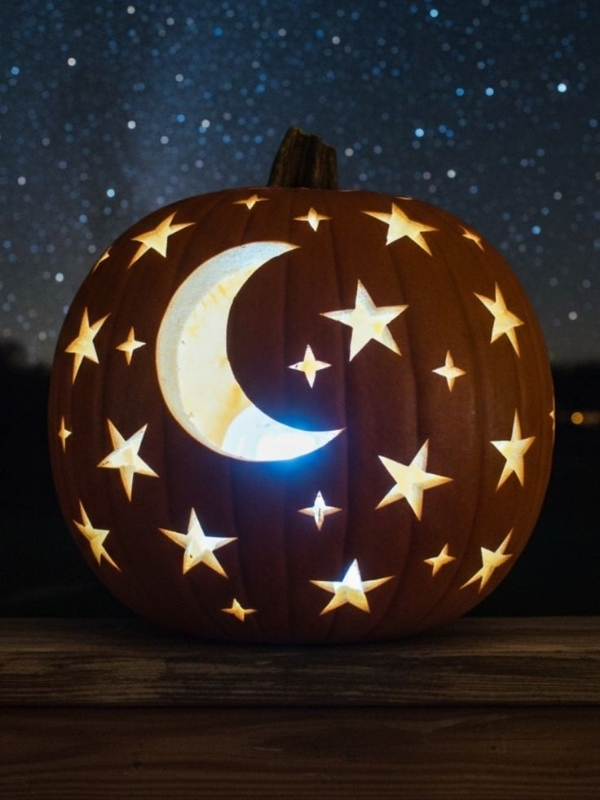
Take the celestial theme one step further by combining a crescent moon with a collection of stars.
Start with a large crescent moon in the center. Then place several stars around it, making some larger than others.
This idea is one of these 25 easy pumpkin carving designs that can look detailed without requiring complicated shapes.
Use a stencil for the moon if you want a perfectly curved shape. The stars can be drawn freehand because small imperfections will not be noticeable once the pumpkin is glowing.
After carving, place a light inside and position the pumpkin somewhere where it can be seen clearly at night.
A moon-and-stars pumpkin looks beautiful beside dark-colored decorations, lanterns, and autumn foliage.
For a softer display, combine it with white and cream pumpkins. For a spookier look, add small bat silhouettes.
You can also create several pumpkins with different celestial designs. One can feature the moon, another stars, and another a simple night sky.
This gives your porch a coordinated appearance while keeping every pumpkin slightly different.
20. Pumpkin with Eyelashes
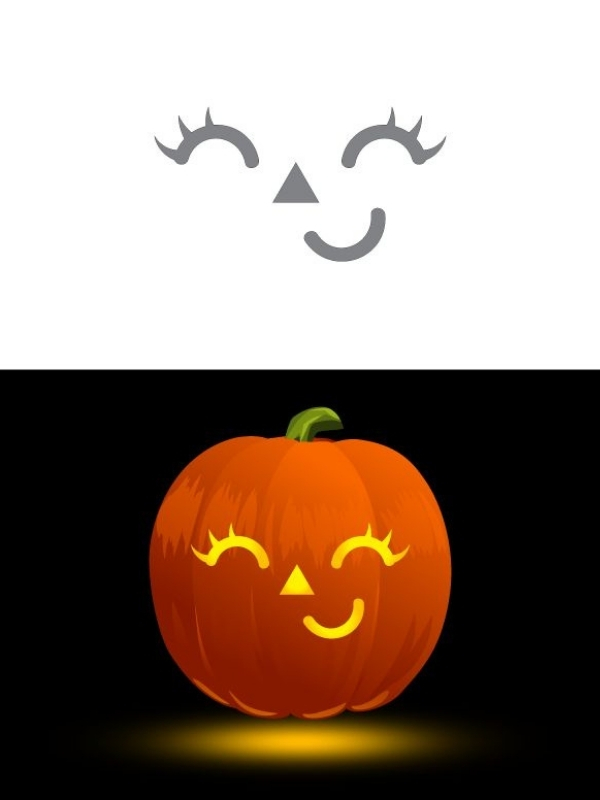
A pumpkin with dramatic eyelashes can add personality to a Halloween display without requiring complicated carving.
Start with simple oval eyes. Then add curved lines above each eye to represent eyelashes.
This is one of the cutest ideas from these 25 easy pumpkin carving designs because the face can be customized easily.
You can give the pumpkin a small smile, a surprised mouth, or a playful wink.
If you are working with several pumpkins, create a collection of different expressions. One pumpkin can wink while another smiles.
For extra decoration, add a ribbon around the stem or place a small decorative bow nearby.
You can also paint the eyelashes if you do not want to make narrow cuts.
This design works well on a porch, bedroom shelf, Halloween party table, or entryway.
Keep the surrounding decorations simple so the face remains the main feature.
A warm light inside the pumpkin will make the eyes and expression stand out beautifully after sunset.
It is a simple way to give a classic pumpkin a little more personality.
21. Haunted House Pumpkin
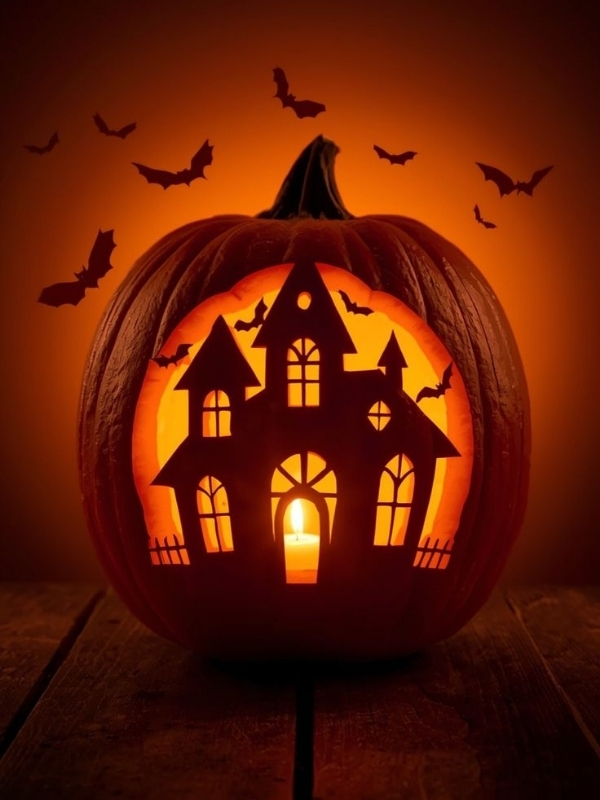
A haunted house silhouette can make your pumpkin look like a tiny Halloween scene.
Choose a simple house stencil with a pointed roof, windows, and a doorway. Avoid too many tiny details if you are new to carving.
This idea adds a little storytelling to these 25 easy pumpkin carving designs because the pumpkin becomes more than just a face.
You can place a crescent moon above the house or add one small tree beside it.
For an easier version, carve only the outline of the house and a few windows. The internal details can be painted or left untouched.
Once illuminated, the windows will create the appearance of a glowing haunted home.
This design works beautifully as part of a larger Halloween display. Place it beside pumpkins featuring bats, ghosts, or stars.
You can also use several pumpkins to create a miniature haunted neighborhood.
Keep the surrounding decorations dark and simple so the carved house remains easy to see.
Despite looking detailed, the basic silhouette is relatively straightforward to transfer with a stencil.
22. Pumpkin with a Crescent Smile
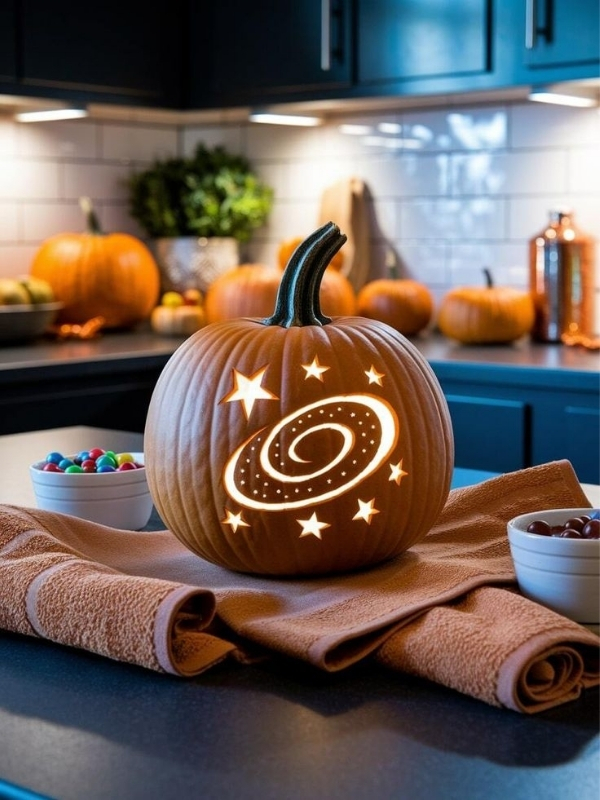
For a minimalist design, try a pumpkin with a large crescent-shaped smile.
Instead of adding eyes and a nose, let the oversized smile become the main feature. You can make it friendly, mischievous, or slightly spooky by changing its shape.
This simple option belongs among these 25 easy pumpkin carving ideas because it requires very few cuts.
Add two tiny eyes above the smile if you want a face. Alternatively, leave the pumpkin with only the curved mouth.
A large smile also gives you room to experiment with teeth. Make a few pointed teeth along the top or bottom edge.
Place a light inside the pumpkin and watch the smile glow.
This design works particularly well when you are short on time but still want something that looks intentional.
You can make several pumpkins with different smile shapes and arrange them together.
For a family display, let each person design their own smile. Some can be wide, some narrow, and some full of playful teeth.
The finished collection will feel personal and handmade.
23. Simple Scared Pumpkin Face
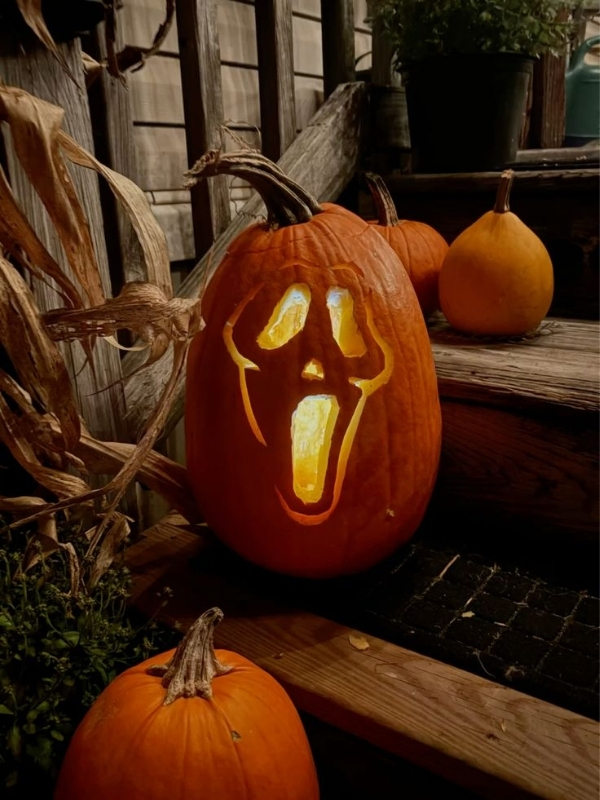
A scared pumpkin face is another easy way to create a fun Halloween expression.
Use large circular eyes, raised eyebrows, and a small open mouth. The combination immediately makes the pumpkin look surprised or frightened.
This is one of the easiest choices among these 25 easy pumpkin carving ideas because it relies on familiar shapes.
You can make the eyes round or slightly oval. Add small pupils if you want more detail, although they are not necessary.
For a more humorous look, make one eyebrow higher than the other.
Once carved, place a light inside and position the pumpkin where guests can see its expression.
A scared pumpkin looks especially fun when placed beside a scary jack-o’-lantern. The contrast creates a playful story between the two pumpkins.
You can also add a small decorative sign nearby with a simple Halloween message.
The design is quick enough for a last-minute Halloween project and simple enough for beginners.
24. Pumpkin with a Friendly Monster Face
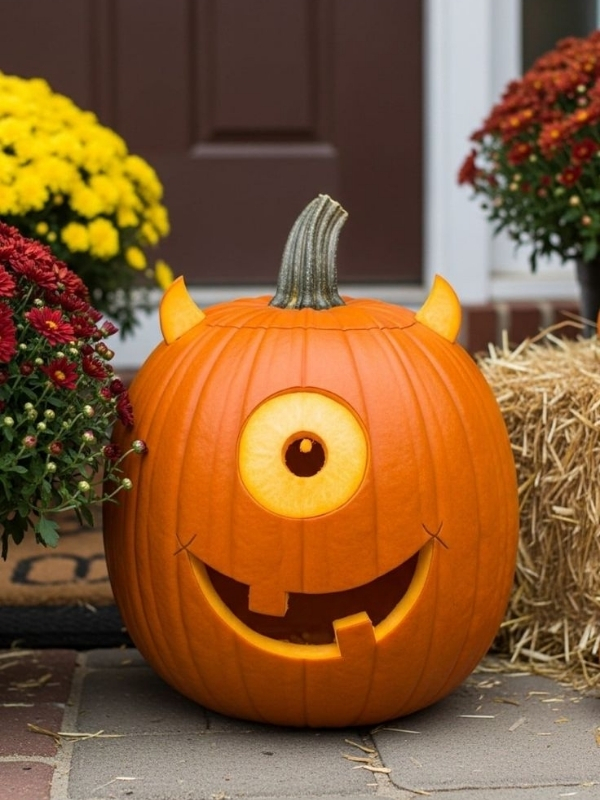
Create a playful monster pumpkin by combining large eyes, a wide mouth, and a few funny teeth.
The monster does not need to look frightening. In fact, an oversized smile and uneven eyes can make it much more adorable.
This idea gives these 25 easy pumpkin carving designs a fun character-inspired option without requiring a complicated stencil.
Try making two different-sized eyes. Add small teeth along the mouth and perhaps a few dots or scars.
You can also give the monster tiny horns or ears if your pumpkin has enough space.
For children, this design can become a fun creative project. Let them draw the expression before an adult handles the carving.
Place the finished monster pumpkin beside smaller pumpkins, autumn leaves, and Halloween decorations.
If you are making multiple pumpkins, give every monster a different face.
Some can look happy, some confused, and some surprised.
This creates a cheerful display that feels more playful than spooky while still fitting perfectly into a Halloween setting.
25. Personalized Initial Pumpkin
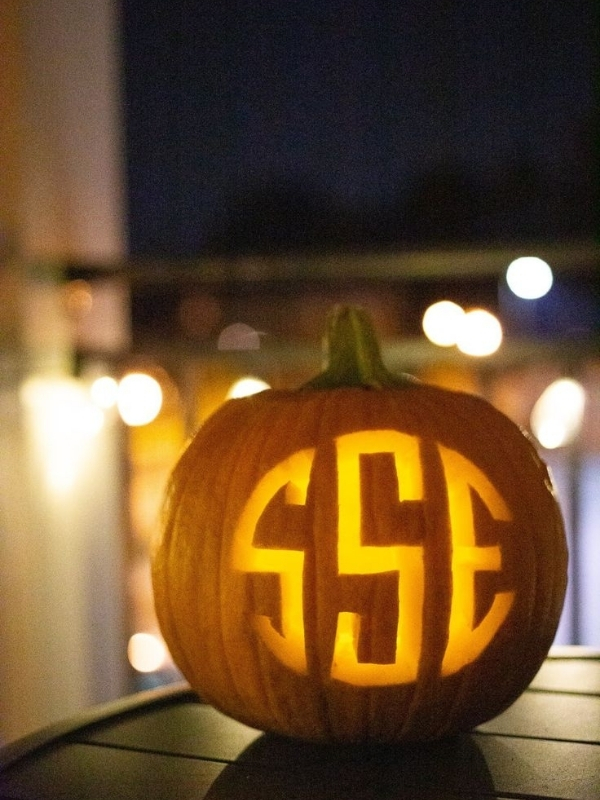
A personalized initial pumpkin is a simple way to make your Halloween decorations feel unique.
Choose one large letter and place it in the center of the pumpkin. You can use a family initial, the first letter of a child’s name, or even the first letter of your surname.
This final idea from these 25 easy pumpkin carving designs is especially useful for personalized porch decorations.
Choose a bold letter because thick lines are easier to carve. A printed alphabet stencil can help you create a clean shape.
You can leave the letter by itself or surround it with stars, leaves, dots, or small bats.
For a family display, create one pumpkin for each person and carve a different initial on each one.
Arrange the pumpkins together near the front door. Add autumn leaves, mini pumpkins, and a seasonal wreath to complete the look.
Personalized pumpkins can also work well for Halloween parties. Use initials to mark different areas of the table or create a themed centerpiece.
The design is simple, meaningful, and easy to customize.
How to Choose the Right Pumpkin for Carving
Before you begin any of these 25 easy pumpkin carving ideas, choosing the right pumpkin can make the entire project easier. Look for a pumpkin that feels firm when you gently press the surface. Avoid pumpkins with soft areas, deep bruises, or visible signs of damage.
Shape also matters. A round pumpkin works beautifully for classic faces, while taller pumpkins can be better for vertical designs such as haunted houses or large lettering. If you want to use a stencil, choose a pumpkin with a relatively smooth surface so the design can transfer more easily.
The stem is another detail worth checking. A strong stem makes the pumpkin easier to handle and can become part of the finished display.
Think about where the pumpkin will go before choosing its size. A large pumpkin can become a porch focal point, while smaller pumpkins work better on tables, shelves, and narrow steps.
If you are carving with children, consider choosing several small pumpkins rather than one very large pumpkin. Smaller designs can feel less overwhelming and allow everyone to create their own decoration.
Most importantly, do not worry about finding a perfectly shaped pumpkin. Small bumps and natural imperfections can actually make handmade Halloween decorations feel more charming.
Simple Tips for Using Pumpkin Carving Stencils
A good stencil can make these 25 easy pumpkin carving projects much less intimidating. Start by printing your design at a size that fits the pumpkin. Before transferring it, hold the paper against the pumpkin to make sure the entire design fits comfortably.
Tape the stencil in place so it does not move while you work. If the pumpkin has a very curved surface, small cuts around the edge of the paper can help it sit more smoothly.
Use a washable marker to trace the important lines. Take your time rather than rushing through the transfer. Clear outlines make carving easier later.
For detailed designs, remember that not every line needs to be cut all the way through. Some patterns can be created by gently scraping away the outer skin. This technique allows light to shine through without removing the entire section.
Once the stencil is transferred, review the design before cutting. Check that separate pieces are connected where necessary so they do not accidentally fall out.
If you are working with children, an adult should handle sharp carving tools. Children can help choose the stencil, draw the design, scoop out the pumpkin, and decorate the finished piece.
A little preparation can make the carving process much smoother and more enjoyable.
Frequently Asked Questions About 25 Easy Pumpkin Carving
What is the easiest pumpkin carving design for beginners?
A classic jack-o’-lantern face is usually one of the easiest choices. It uses basic shapes such as triangles, circles, and a simple curved mouth. Lettering, stars, hearts, and crescent moons are also beginner-friendly options because they do not require many complicated cuts.
Can I use a printed stencil for pumpkin carving?
Yes. Printed stencils are especially helpful when you want a specific shape or character. Choose a design that matches the size of your pumpkin and secure the paper before tracing. Simple stencils are usually easier to transfer and carve than designs with many tiny details.
How can I make my carved pumpkin last longer?
Choose a firm pumpkin without soft spots, keep it away from excessive heat, and avoid leaving it in direct sunlight. A clean carving process can also help. Battery-powered lights are a good alternative to traditional candles because they do not create heat inside the pumpkin.
What tools do I need for easy pumpkin carving?
For simple designs, you need a pumpkin, a marker, a carving tool, and something to scoop out the inside. A printed stencil can also be useful. If you are carving with children, an adult should handle sharp tools while children help with safer decorating tasks.
Can children make these pumpkin carving ideas?
Children can absolutely participate in the creative process. However, sharp carving tools should be handled by an adult. Kids can choose their designs, help draw the stencil, scoop out pumpkin seeds with supervision, and decorate the finished pumpkin with paint or other safe materials.
Conclusion
Pumpkin carving does not have to become a competition to see who can create the most complicated design. Sometimes, the simplest pumpkin is the one that brings the most personality to a Halloween display.
These 25 easy pumpkin carving ideas give you plenty of options, whether you prefer classic jack-o’-lantern faces, cute ghosts, playful monsters, elegant stars, or personalized initials. You can follow a stencil closely or use these designs as inspiration for something completely your own.
The best part is that every pumpkin can tell a different little story. One might look funny, another might look spooky, and another might simply have a beautiful autumn pattern.
So choose your favorite design, gather your pumpkins, and make an afternoon of it. Put on some seasonal music, invite the family to join you, and enjoy the creative process.
By Halloween night, your carved pumpkins will add a warm, personal touch to your porch and make your home feel ready for the season.