25 Easy Paper Quilling Ideas for Beginners to Make at Home
The first time I saw paper quilling, I honestly thought it looked far too complicated for a beginner. Every tiny swirl and delicate flower seemed like something only experienced crafters could create. I admired the beautiful designs online but convinced myself that my hands simply weren’t steady enough, that’s why i made this 25 Easy Paper Quilling Ideas for Beginners to Make at Home so that you won’t underestimate your craft ability like i did.
One quiet afternoon, though, curiosity got the better of me. Armed with a few colorful paper strips, a simple quilling tool, and plenty of patience, I decided to give it a try. My very first project wasn’t perfect. The coils were uneven, and the petals looked a little wonky. Yet, when I stepped back and looked at what I had made with nothing more than paper, I couldn’t help but smile.
That small success sparked a new hobby I genuinely enjoyed.
If you’ve ever wanted to make something beautiful without spending a fortune on craft supplies, paper quilling is a wonderful place to start. It’s relaxing, affordable, and surprisingly easy once you learn a few basic shapes. Better still, many projects can be completed right at your kitchen table using simple materials.
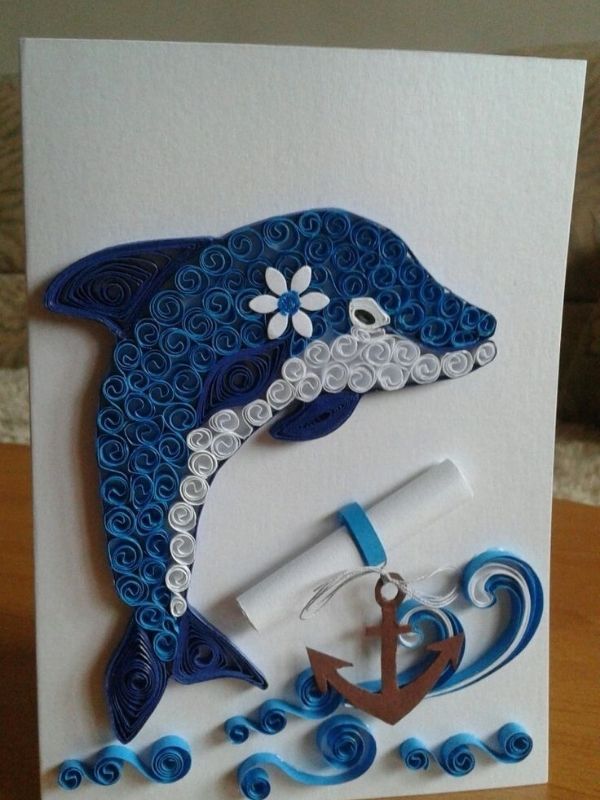
In this guide, you’ll discover 25 easy paper quilling ideas for beginners to make at home. Whether you’re decorating greeting cards, creating thoughtful gifts, or simply looking for a calming creative activity, these beginner-friendly ideas will inspire you to start rolling paper into beautiful works of art.
Below are 25 Easy Paper Quilling Ideas for Beginners to Make at Home
Why Paper Quilling Is Perfect for Beginners
Paper quilling is one of those crafts that looks impressive but is surprisingly simple to learn. Unlike many other creative hobbies, it doesn’t require expensive equipment or years of experience. Instead, it relies on a handful of affordable tools, a little patience, and your creativity.
For this reason, paper quilling has become a favorite craft for beginners around the world.
Here are just a few reasons why so many people love getting started with paper quilling:
- First and foremost, it’s incredibly budget-friendly, making it an excellent hobby for crafters of all ages.
- Additionally, most projects require only paper, glue, and a few basic tools.
- Furthermore, you can complete many simple designs in under an hour, making it perfect for busy schedules.
- Moreover, paper quilling is a relaxing hobby that can help reduce stress while encouraging creativity and mindfulness.
- Equally important, handmade quilled creations make thoughtful, personalized gifts for family and friends.
- Finally, every project you complete helps strengthen your skills and build your confidence.
Ultimately, the more you practice, the more comfortable you’ll become with different techniques and shapes. As a result, you’ll naturally begin experimenting with more detailed designs and creating beautiful paper quilling projects that showcase your creativity.
Below are 25 Easy Paper Quilling Ideas for Beginners to Make at Home
Check out our
25 Heartwarming Mother’s Day Messages to Make Her Smile
How to Make a Summer Scrapbook for Special Family Memories
DIY Father’s Day Photo Frame Crafts Kids Can Easily Make
Basic Supplies You’ll Need
Before you begin, gather these essentials:
Quilling paper strips
- Slotted quilling tool
- White craft glue
- Tweezers
- Small scissors
- Circle sizing board (optional)
- Toothpicks for applying glue
- Cardstock or canvas for mounting your artwork
- Pencil and ruler
Once your supplies are ready, it’s time to start creating.
25 Easy Paper Quilling Ideas for Beginners to Make at Home
1. Simple Quilled Hearts
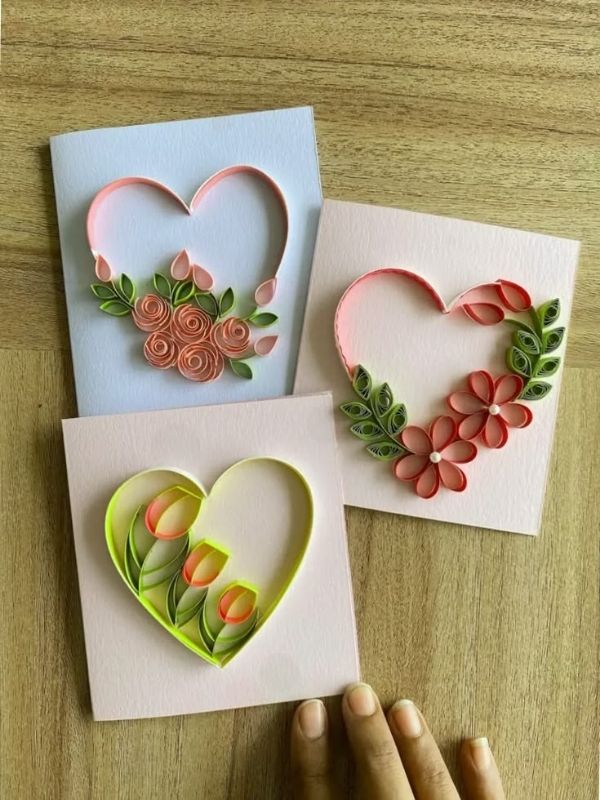
Heart designs are one of the easiest paper quilling projects for beginners.
Roll two loose coils, pinch each into a teardrop shape, and place them together to form a heart. These tiny hearts look beautiful on greeting cards, bookmarks, gift tags, or scrapbook pages.
Try using different shades of pink, red, purple, or even rainbow colors for a playful touch.
2. Colorful Quilled Flowers
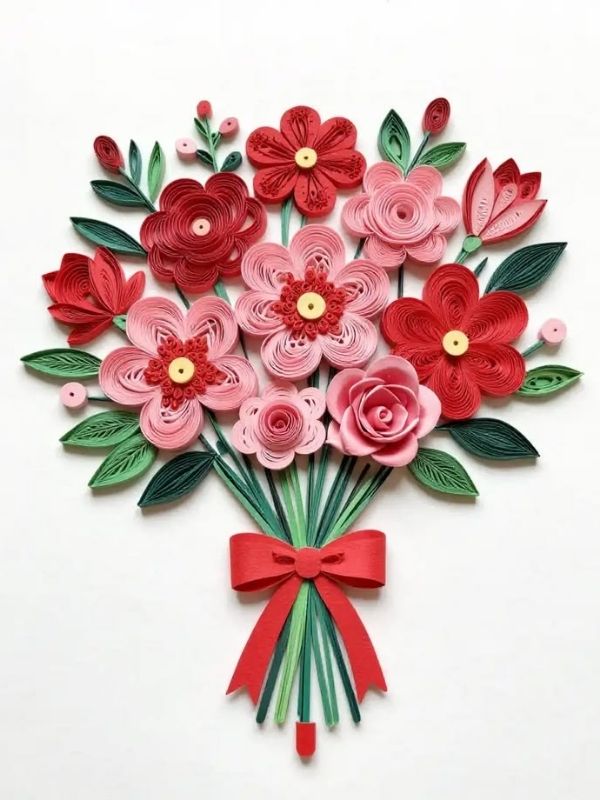
Flowers are among the most popular paper quilling designs because they’re simple yet elegant.
Start by making several teardrop shapes for petals. Arrange them around a tight coil center, then glue them onto cardstock.
Experiment with different petal sizes and color combinations to create daisies, sunflowers, or whimsical blooms.
You may also like
Free Printable Father’s Day Coupons Kids Can Make at Home
30 Easy Popsicle Stick Craft Ideas for Kids and Adults to Make at Home
20 Fall Centerpiece Ideas for Dining Table Decor
18 Simple Thanksgiving Dinner Ideas for Small Families
15 Thanksgiving Outfit Ideas for Family Dinner
3. Mini Butterflies
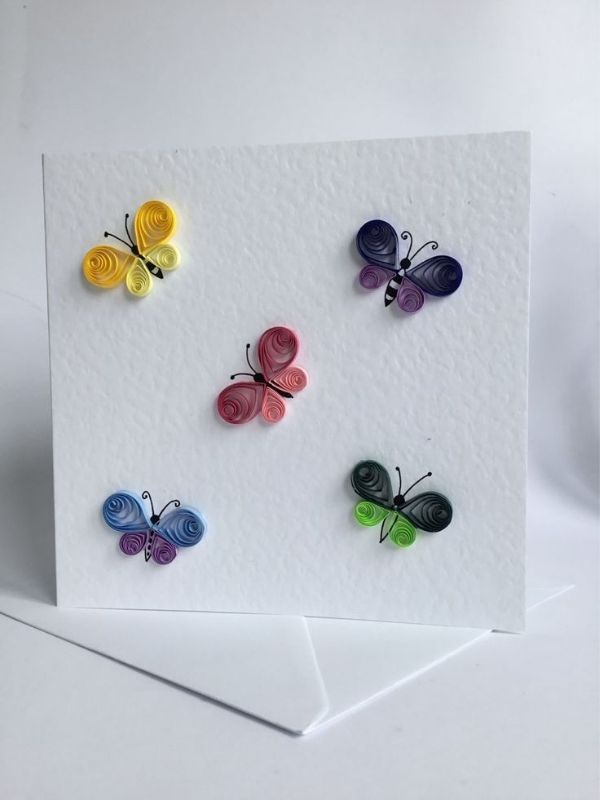
Butterflies are perfect for practicing basic shapes.
Use marquise shapes for the wings and a tight coil for the body. Add tiny paper strips for antennae.
These delicate butterflies make lovely decorations for handmade cards, journals, and gift wrapping.
4. Paper Quilling Leaves
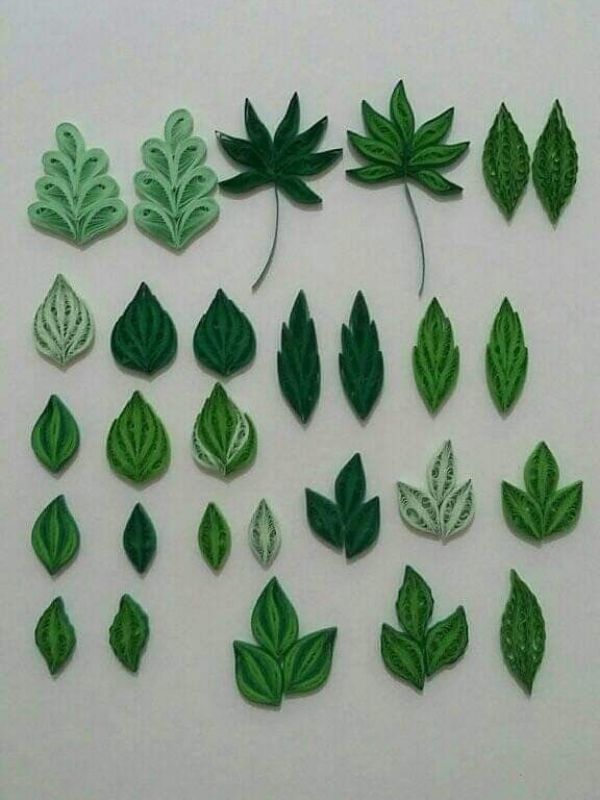
Leaves help beginners master eye-shaped coils.
Create loose coils, pinch both ends, and slightly curve each leaf to give it a natural appearance.
Mix several shades of green, or create autumn leaves using orange, yellow, and burgundy paper.
5. Quilled Greeting Cards
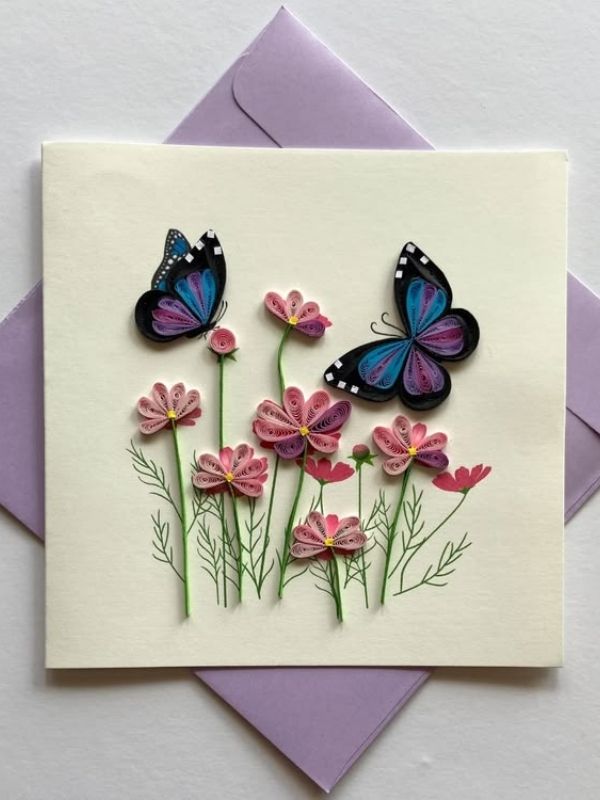
Instead of buying expensive greeting cards, make your own.
Decorate blank cards with quilled flowers, hearts, balloons, stars, or initials. Handmade cards instantly feel more thoughtful and personal.
Friends and family will appreciate the extra effort behind your beautiful creation.
6. Monogram Letters
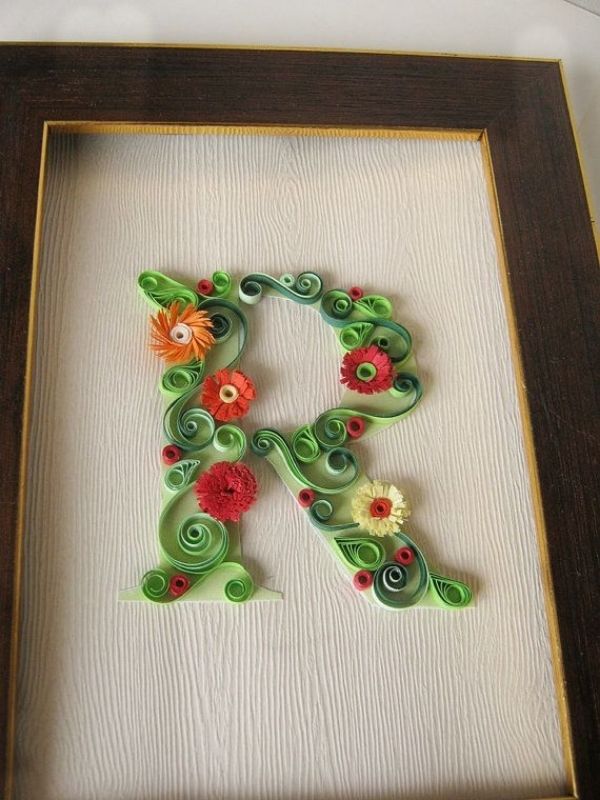
Personalized initials make wonderful gifts. Print or lightly sketch a large letter onto cardstock before filling it with colorful quilled coils.
Mix tight coils, loose coils, teardrops, and marquise shapes for added texture and dimension.
7. Easy Quilled Balloons
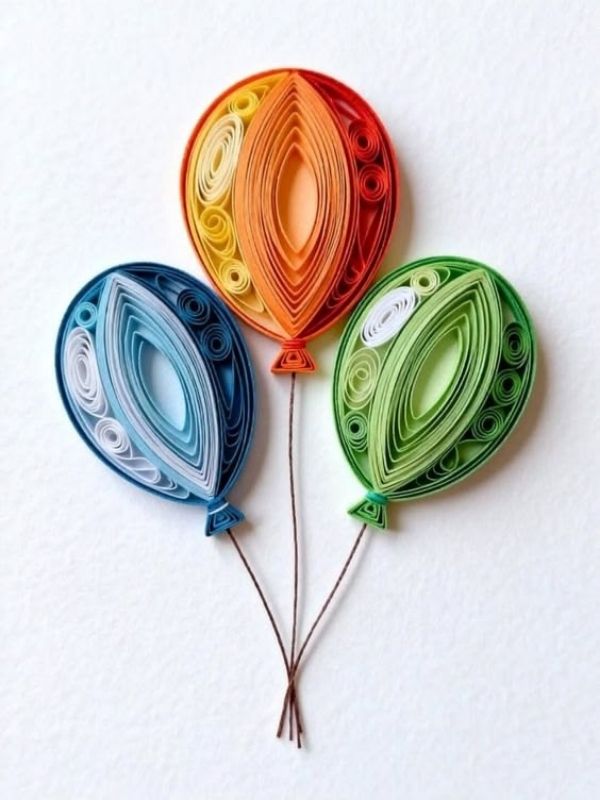
These cheerful balloons are ideal for birthdays and celebrations.
Shape loose coils into small ovals before attaching thin paper strips underneath as balloon strings.
Finish the design with tiny bows made from narrow paper strips for extra charm.
8. Cute Quilled Ladybugs
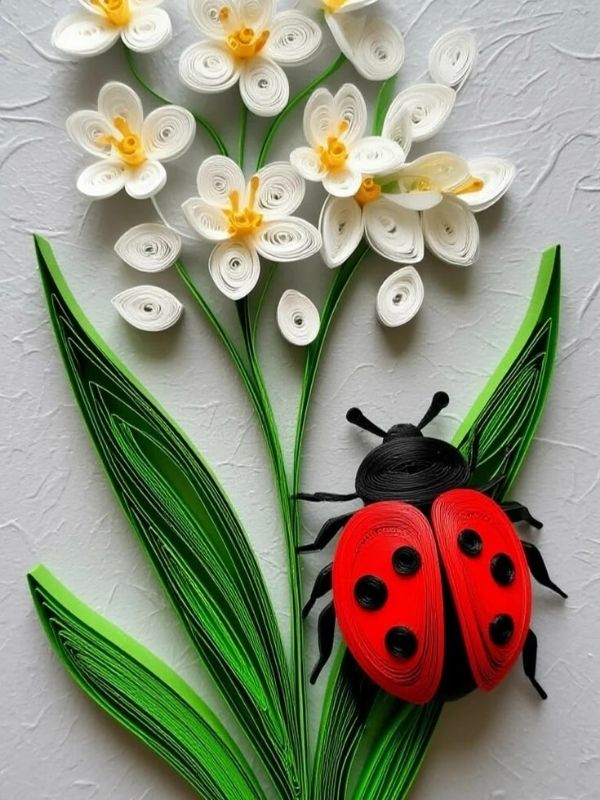
Ladybugs are fun for children and beginners alike. Use red coils for the wings, black paper for the head, and tiny black circles for the spots.
Mount them onto flowers or leaves to create adorable spring-themed artwork.
9. Rainbow Wall Art
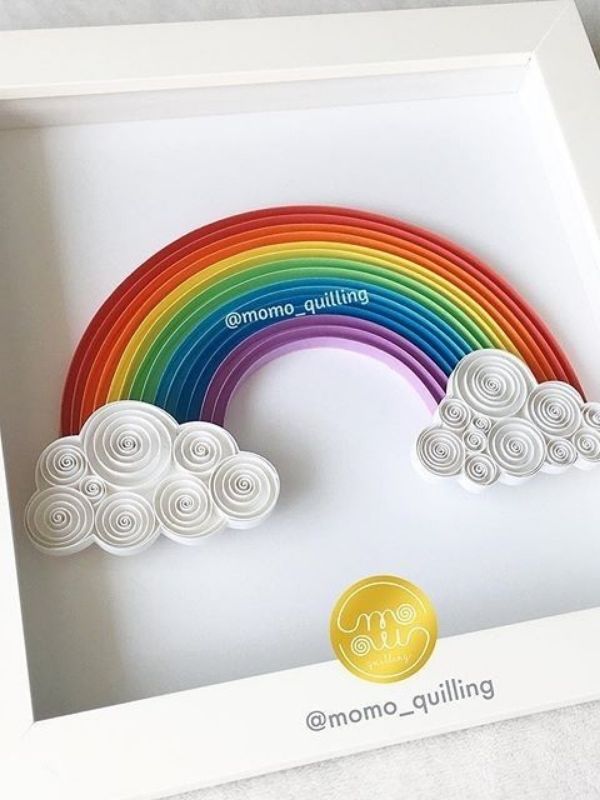
Bright colors instantly bring life to any room.
Arrange quilled coils in rainbow order, adding fluffy paper clouds beneath each arch. Frame your finished artwork for a cheerful decoration in a bedroom, craft room, or nursery.
10. Simple Snowflakes
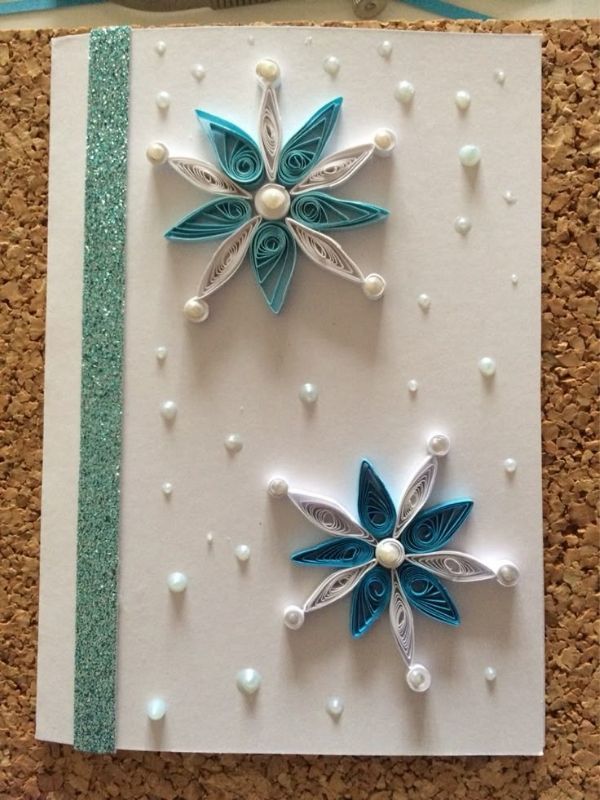
Even if you’re just getting started, snowflakes aren’t just for winter experts.
With just a few simple techniques, you can use basic teardrops, marquise shapes, and tight coils to build delicate snowflake patterns that look stunning on holiday cards or Christmas decorations.
What makes this project even more special is that each snowflake can be completely unique, which means you’ll enjoy creating one-of-a-kind designs every time.
11. Quilled Buttercup Flowers
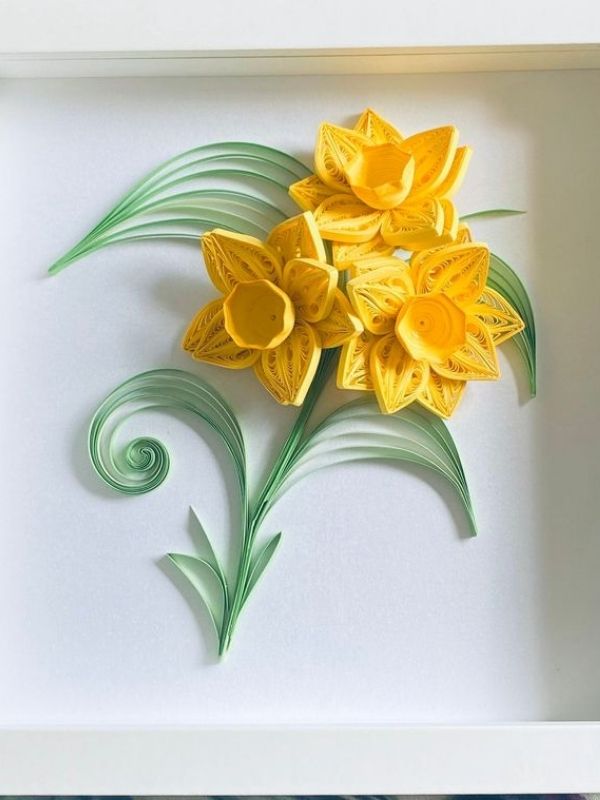
If you’re ready to try a slightly different flower design, buttercups are a great choice. Their cheerful appearance adds brightness to almost any paper craft.
Create five teardrop-shaped petals and arrange them around a tightly rolled yellow center. Then, add a green stem and a pair of leaves to complete the look.
You can use these flowers to decorate handmade bookmarks, journals, gift boxes, or picture frames.
12. Paper Quilling Bookmarks
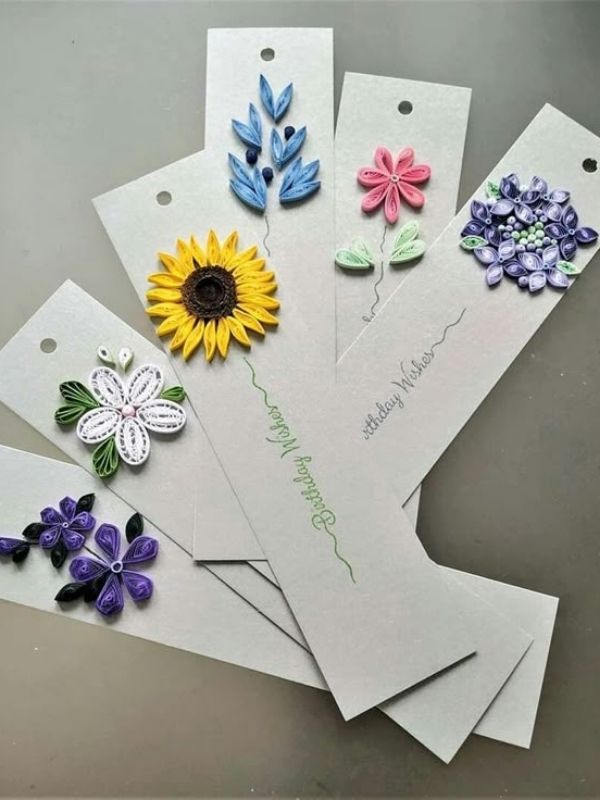
A handmade bookmark is both practical and beautiful. It also makes a thoughtful gift for someone who enjoys reading.
Start with a strip of sturdy cardstock as your bookmark base. Next, decorate the top with a small quilled flower, butterfly, heart, or even a colorful swirl design.
Since bookmarks are used often, remember to glue every piece securely and allow it to dry completely before using it.
13. Cute Quilled Owls
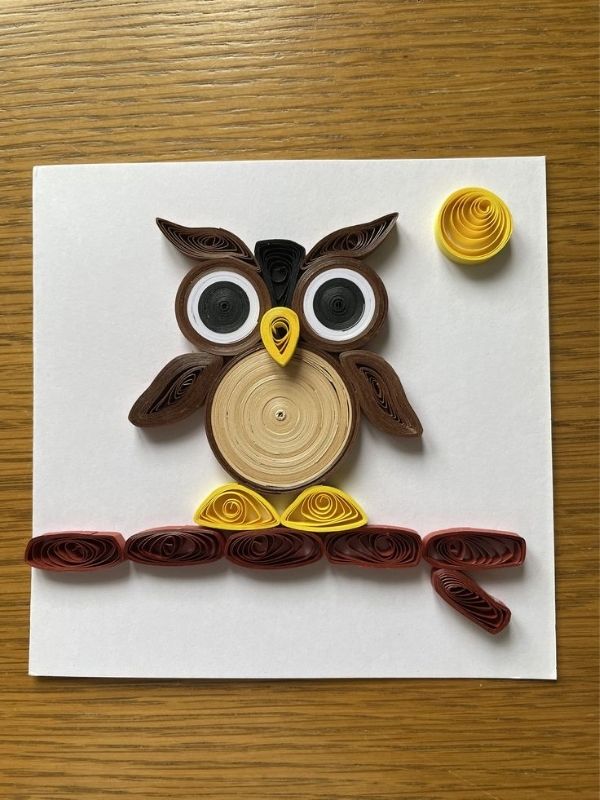
Owls are surprisingly easy to make once you’ve mastered a few basic quilling shapes.
Use loose brown coils for the body, smaller circles for the eyes, and tiny orange triangles for the beak. Finish the design with small paper wings and little feet.
These adorable owls look lovely on greeting cards or framed nursery artwork.
Check out our
10 Non-Scary Halloween Decor Ideas
20 Thanksgiving Place Card Ideas for Guests
20 Trending Prom Dresses Everyone Is Obsessed With in 2026
14. Quilled Sun
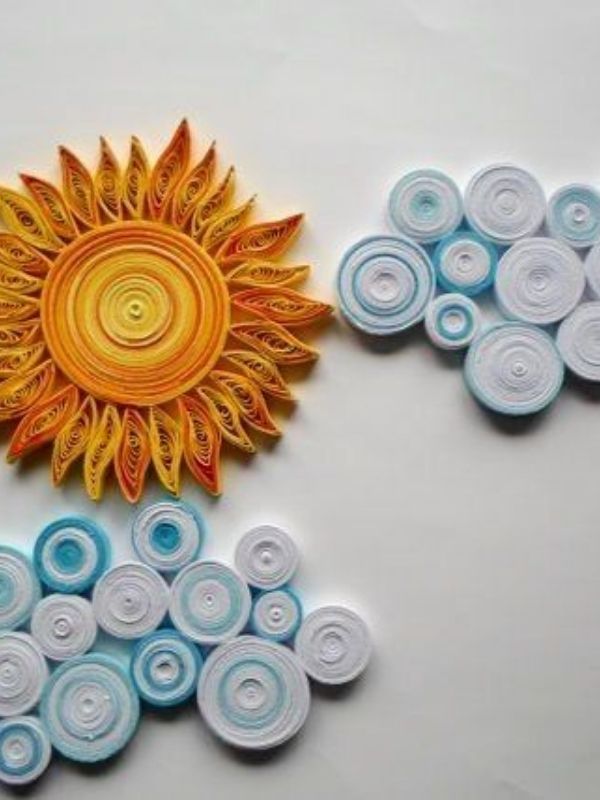
Bring a little sunshine indoors with this cheerful project.
Create a large yellow tight coil for the center before surrounding it with marquise-shaped rays. You can even add a smiling face if you’re making crafts with children.
This simple design pairs beautifully with clouds, rainbows, and flowers in seasonal artwork.
15. Paper Quilling Tree
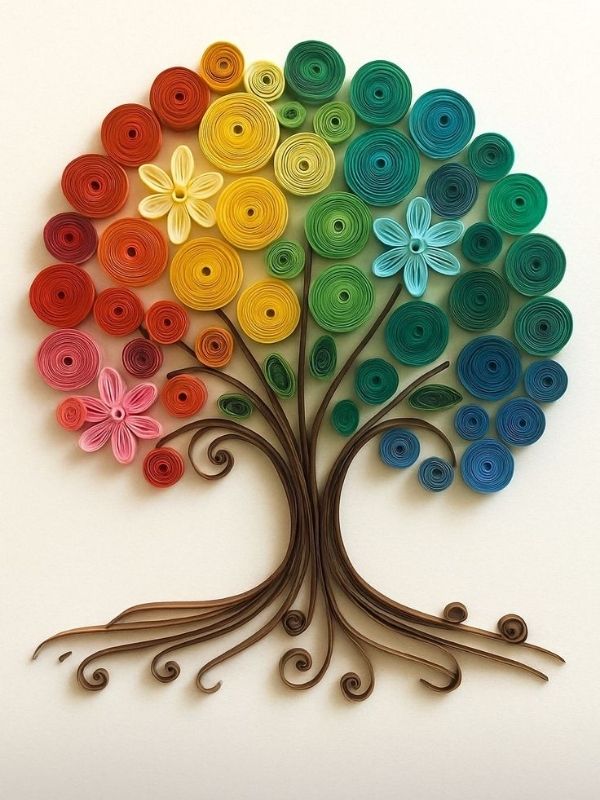
Trees are wonderful beginner projects because they combine several easy shapes into one design.
Roll multiple green coils to create a full tree canopy. Afterwards, glue them above a simple brown paper trunk.
For extra creativity, decorate the tree with tiny flowers, apples, autumn leaves, or even miniature birds.
16. Quilled Stars
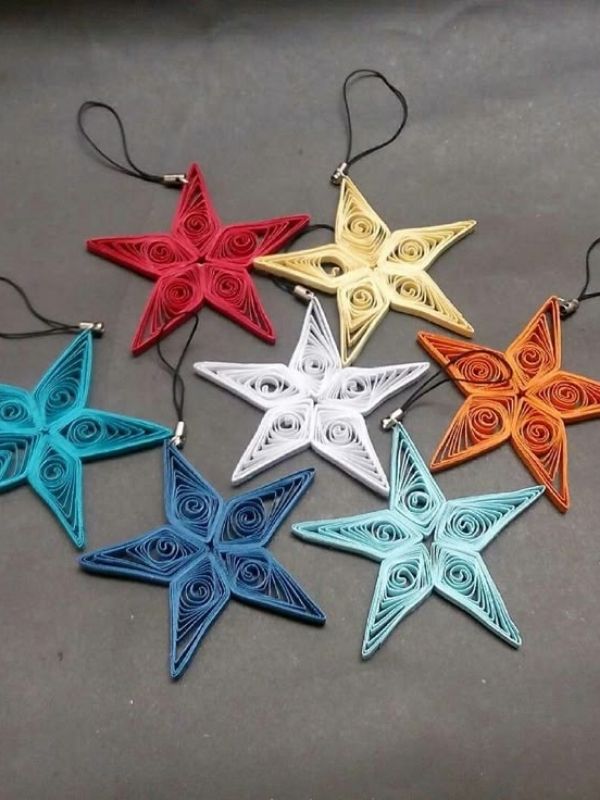
Stars are quick to make and suitable for almost every occasion.
Shape five marquise pieces into points before joining them together in the center. Alternatively, create filled stars using several tight coils inside a star outline.
These stars make wonderful decorations for holiday cards, birthday crafts, and festive banners.
17. Beautiful Quilled Feathers
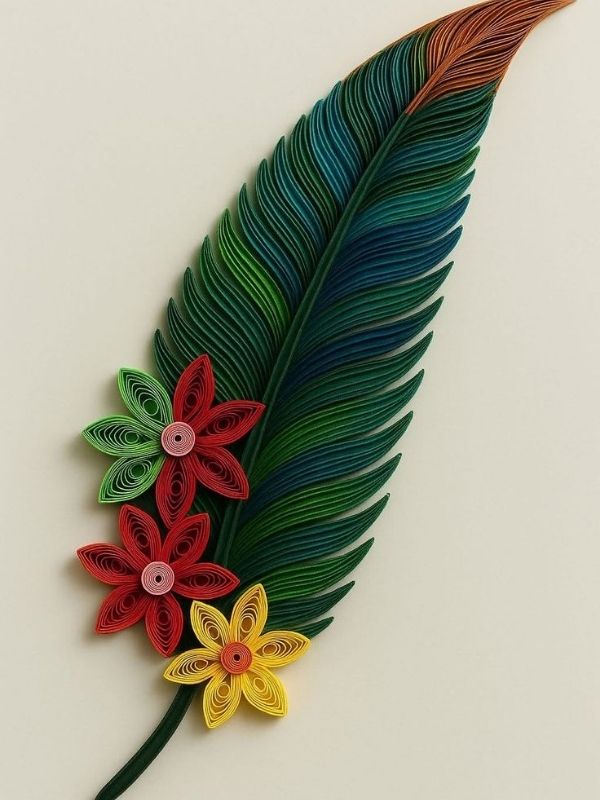
Paper feathers look elegant despite being beginner-friendly.
Start by making a thin paper stem. Then, attach tiny marquise shapes along both sides to create the feather’s soft texture.
Display several feathers together in different colors for a striking piece of wall art.
18. Quilled Hot Air Balloon
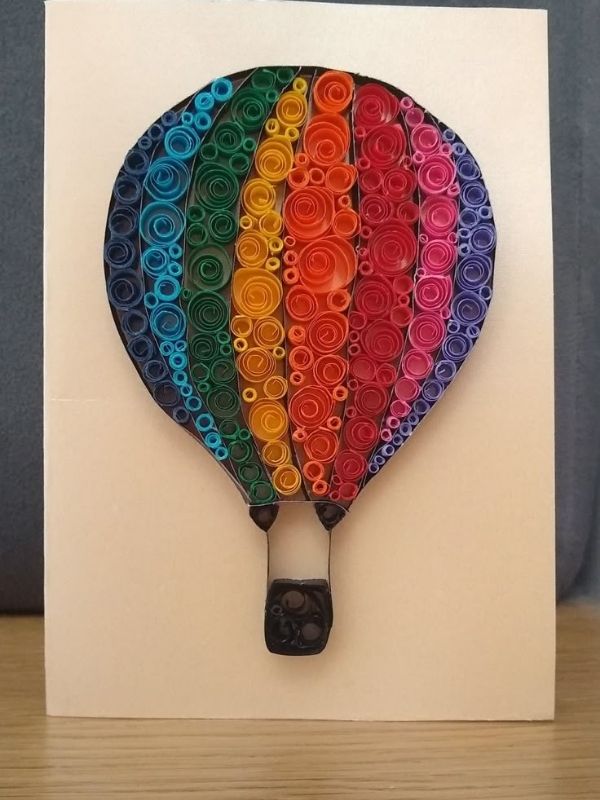
To begin with, hot air balloons are colorful projects that allow you to experiment with different paper shades.
Next, form an oval balloon using several loose coils. Then, add a tiny basket underneath, with thin paper strips connecting the two. As a result, this design is perfect for children’s room decorations or handmade birthday cards.
19. Paper Quilling Fish
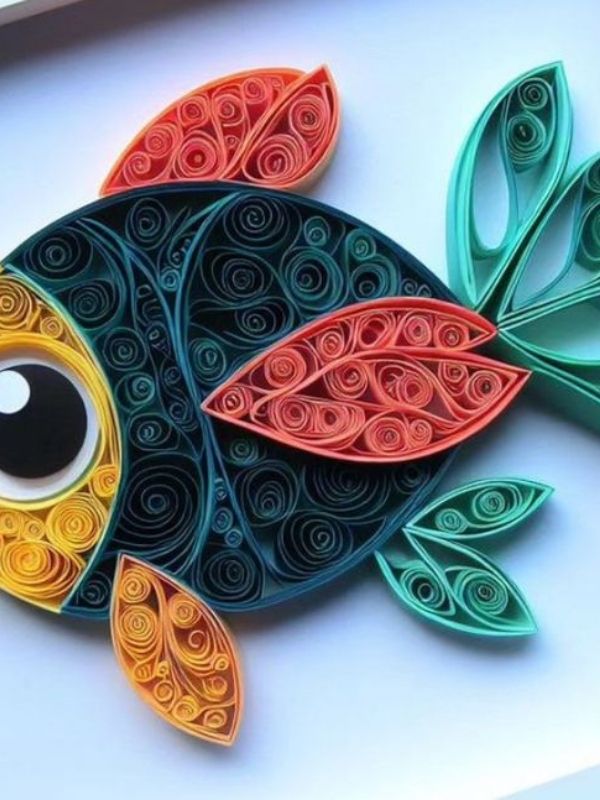
If you enjoy ocean-themed crafts, this idea is worth trying.
Create an oval body using loose coils before adding a triangle-shaped tail, small fins, and a tiny eye.
Choose bright blues, oranges, pinks, or rainbow colors to make your fish stand out.
20. Quilled Cupcake
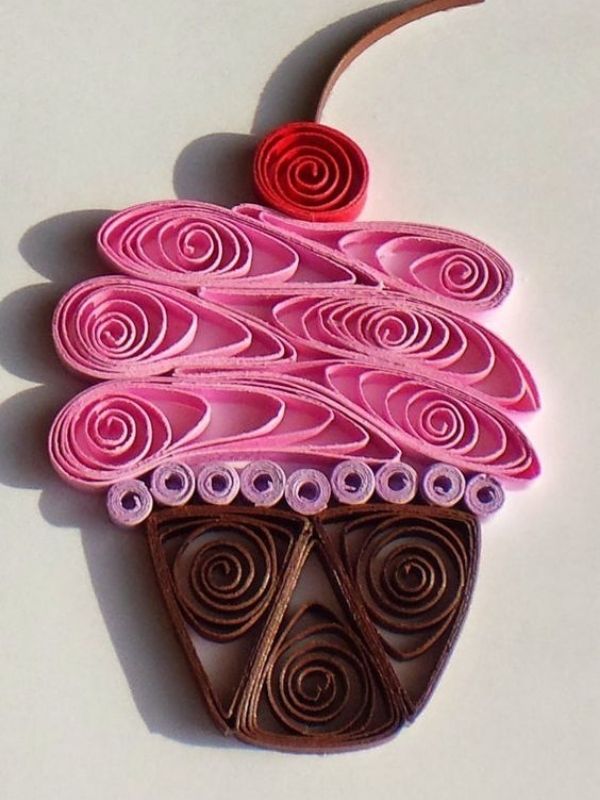
To start with, a paper cupcake is a sweet addition to birthday decorations.
Next, use brown paper for the cupcake liner, pastel-colored coils for the frosting, and then finish with a tiny red coil that resembles a cherry. Finally, adding small paper sprinkles can make your design even more eye-catching.
21. Quilled Dragonfly
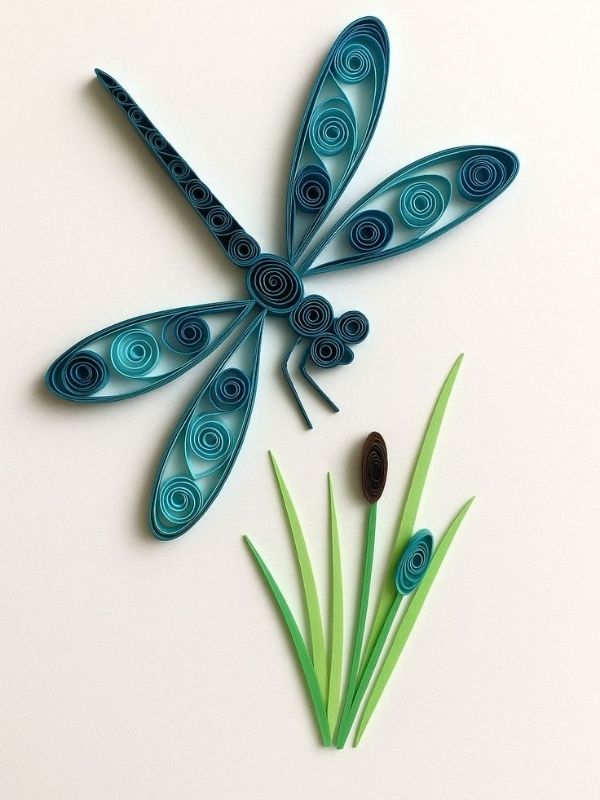
Dragonflies have delicate wings that are surprisingly simple to create.
Roll four marquise shapes for the wings and use a long, tightly rolled strip for the body.
Soft blues, purples, and greens give this project a light, elegant appearance.
22. Paper Quilling Candle
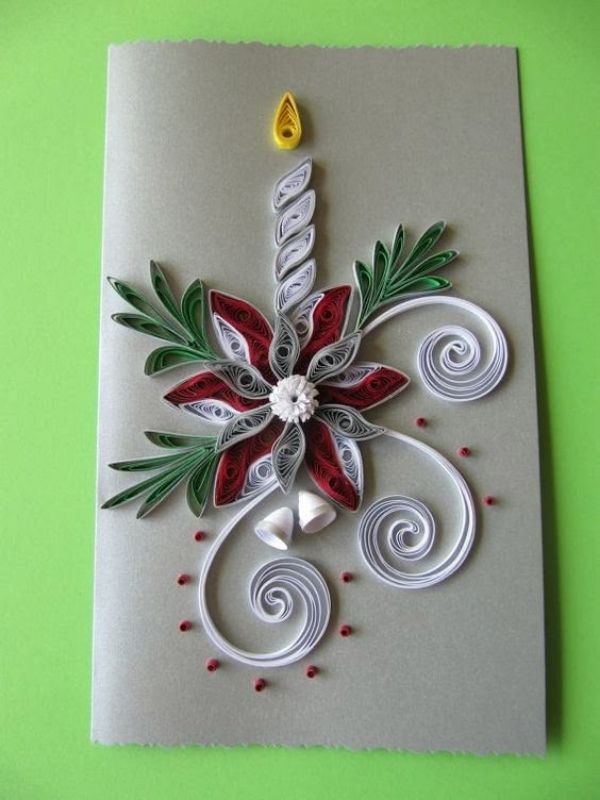
This project works especially well for birthday and holiday cards.
Shape a simple candle using narrow paper strips, then add a tiny yellow teardrop for the flame.
You can arrange several candles together to celebrate birthdays, anniversaries, or festive occasions.
23. Quilled Wreath
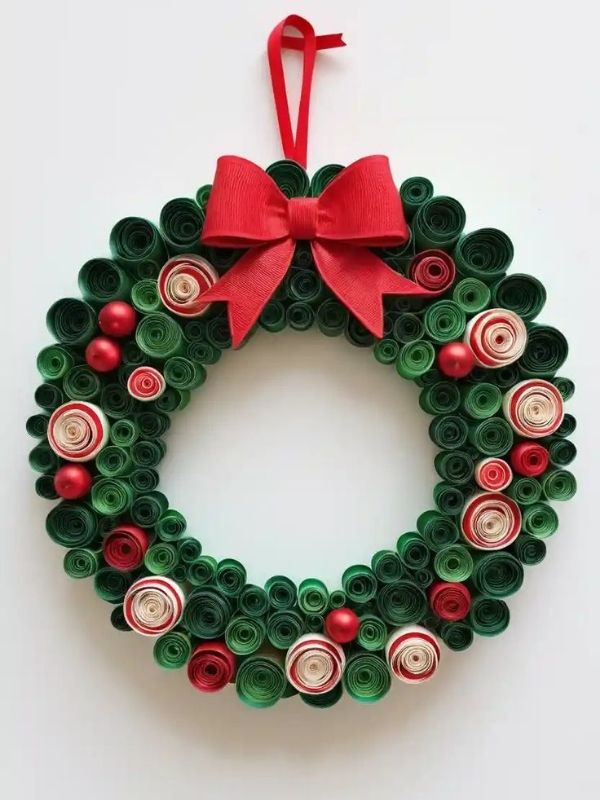
A miniature wreath looks beautiful throughout the year.
Create a circular base before covering it with small green leaves and tiny flowers. Depending on the season, you can customize your wreath with berries, bows, pumpkins, or snowflakes.
As a result, one design can be adapted for many celebrations.
24. Quilled Fruit Designs
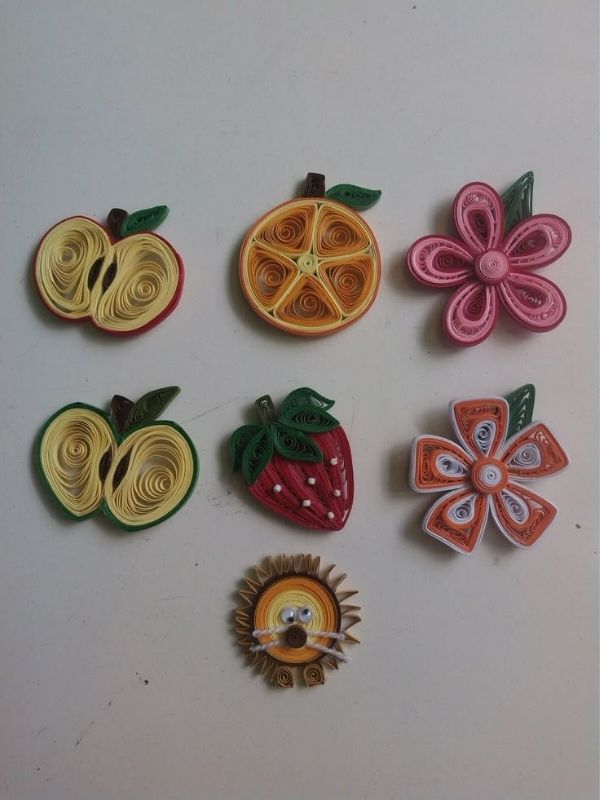
Fruit-themed quilling projects are colorful and enjoyable for beginners.
Try making strawberries, apples, lemons, oranges, cherries, or watermelons using simple coils and teardrop shapes.
These cheerful designs are perfect for recipe journals, kitchen décor, and handmade recipe cards.
25. Framed Paper Quilling Artwork
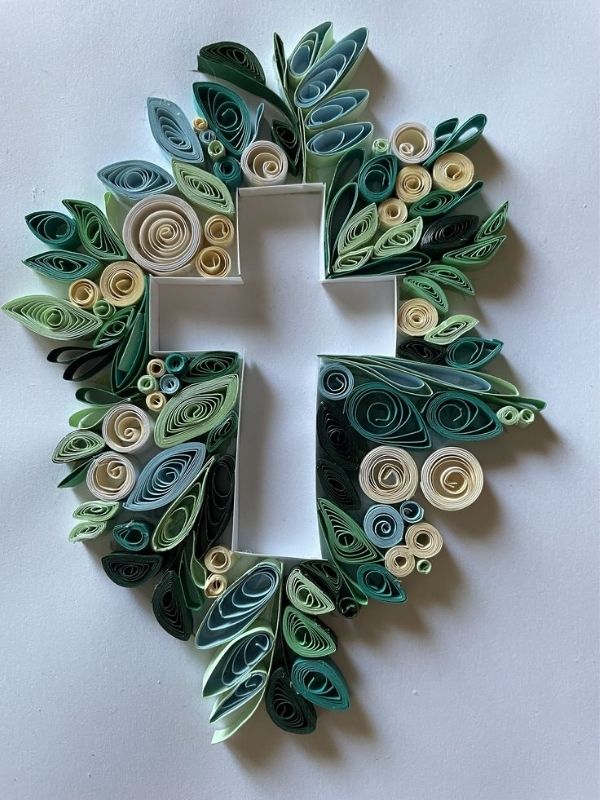
Once you’ve completed several beginner projects, combine your favorite designs into one framed masterpiece.
Arrange flowers, butterflies, hearts, leaves, and inspirational words on sturdy cardstock before placing everything inside a shadow box or frame.
Not only does this showcase your progress, but it also creates a beautiful piece of handmade home décor you’ll be proud to display.
Tips for Successful Paper Quilling
As you continue practicing paper quilling, adopting a few simple habits can make a significant difference in the appearance of your projects. Ultimately, these small improvements can help your designs look cleaner, more professional, and more enjoyable to create.
First and foremost, start with basic shapes before attempting detailed patterns. Building a strong foundation will make it much easier to tackle more intricate designs later on.
Additionally, apply glue sparingly to avoid messy edges and unwanted marks. As a result, your finished pieces will have a neater and more polished appearance.
Furthermore, allow each section to dry completely before moving or handling it. Consequently, you’ll reduce the risk of shifting pieces and maintain the accuracy of your design.
Equally important, practice rolling coils with even pressure. Consistent rolling helps create uniform shapes, which contributes to a more balanced and attractive finished project.
Moreover, keep your paper strips clean, smooth, and flat throughout the crafting process. In doing so, you’ll prevent creases, dirt, and imperfections from affecting your work.
Finally, store leftover paper strips in labeled containers for easy access. Not only does this keep your crafting area organized, but it also saves time whenever you begin a new project.
Overall, following these simple yet effective tips will help you develop better quilling techniques and create beautiful handmade designs with greater confidence.
Common Mistakes to Avoid in this 25 Easy Paper Quilling Ideas
Before you move on to more advanced designs, it’s important to recognize a few common mistakes that many beginners make. Fortunately, once you’re aware of them, they’re simple to avoid and correct.
First and foremost, using too much glue is one of the most common mistakes. Excess glue can make your paper soggy, create messy edges, and leave visible marks on your finished design. Therefore, apply only a small amount of glue to keep your project neat and professional.
Additionally, many beginners roll their coils too tightly, even when a loose shape is needed. As a result, the finished design may not match the intended pattern. For this reason, always pay close attention to the instructions and adjust the tightness of your coils accordingly.
Furthermore, it’s tempting to skip the basics and jump straight into complicated projects. However, taking time to practice simple shapes such as circles, teardrops, marquise shapes, and leaves will build your confidence and improve your skills. Eventually, these foundational techniques will make creating intricate designs much easier.
Most importantly, avoid comparing your first project to someone else’s years of experience. After all, every expert paper quiller started as a beginner. Instead, focus on your own progress, celebrate small improvements, and enjoy the learning process. With patience and consistent practice, your paper quilling skills will continue to grow.
Conclusion
These 25 easy Paper quilling ideas proves that you don’t need expensive supplies or years of crafting experience to create something beautiful. With just a few paper strips, a little glue, and a bit of patience, you can transform simple materials into eye-catching decorations, thoughtful gifts, and keepsakes you’ll treasure.
Whether you begin with a tiny heart, a colorful flower, or a framed masterpiece, every project is an opportunity to learn a new skill and express your creativity. Start with the ideas that inspire you most, practice the basic shapes, and don’t be afraid to experiment with different colors and patterns along the way.
Before long, you’ll discover that paper quilling isn’t just a craft, it’s a relaxing hobby that brings joy, encourages creativity, and fills your home with handmade beauty. Happy quilling!