How to Create a Dream Catcher With Yarn and Sticks
Learn How to Create a Dream Catcher With Yarn and Sticks.
A quiet afternoon at home can turn into something unexpectedly beautiful when your hands are busy creating. Sometimes, the best decorations are not the ones purchased from a store shelf or wrapped inside glossy packaging. Instead, they are the pieces shaped slowly with patience, soft music playing in the background, and bits of yarn scattered across the table while sunlight slips through the window.
That is part of what makes making a dream catcher feel so personal.
A handmade dream catcher carries a softness that instantly changes the atmosphere of a room. It adds warmth to blank walls, brings texture into a cozy corner, and somehow makes a bedroom feel gentler at the end of a long day. Even more, creating one from yarn and sticks gives the entire project a grounded, rustic charm that feels calm and earthy without trying too hard.
For many people.

These How to Create a Dream Catcher are tied to creativity, peaceful sleep, and meaningful handmade decor. Others simply enjoy them because they look beautiful hanging near a bed, reading nook, or nursery window. Regardless of the reason, the process of making one can feel relaxing in a way that modern life rarely allows anymore.
Meanwhile, using sticks and yarn instead of plastic hoops or expensive craft supplies makes the entire project feel more natural and approachable. You do not need professional crafting experience. You also do not need a large budget or complicated tools. A few gathered materials, a little imagination, and enough time to enjoy the process are usually more than enough.
Another lovely thing about this project is how customizable it becomes. Some dream catchers end up minimal and neutral with cream-colored yarn and soft feathers. Others become vibrant and playful with beads, ribbons, and layered textures. Every version reflects the personality of the person creating it, which is probably why no two handmade dream catchers ever feel exactly the same.
Additionally, this DIY project works beautifully during quiet weekends, rainy afternoons, sleepovers, family craft nights, or even seasonal decorating moments. It can become a calming personal hobby or a thoughtful handmade gift for someone special. Either way, the finished result often feels more meaningful because it was created slowly by hand instead of bought quickly online.
If you have been wanting a creative home project that feels peaceful, inexpensive, and genuinely enjoyable, this is one of those crafts worth trying. The process How to Create a Dream Catcher is not rushed. The materials are simple. Yet the final piece can look surprisingly elegant hanging inside a cozy room.
Learn How to Create a Dream Catcher:
Check out our Creative 4th of July Activities for Kids and Adults (Games, Crafts & More)
How to Create a Dream Catcher With Yarn and Sticks
Step 1. Gather the Yarn, Sticks, and Decorative Supplies You Want to Use
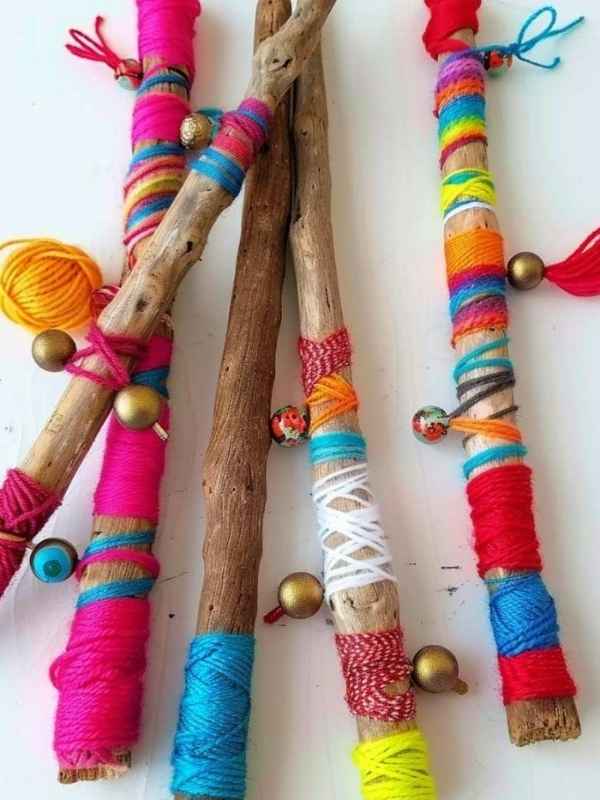
Before beginning the actual crafting process, it helps to spend a little time choosing materials carefully. Although dream catchers can be made with very simple supplies, the textures and colors you pick will shape the entire mood of the finished piece. Therefore, starting with thoughtful materials makes the project feel even more satisfying later on.
For the base, sticks are one of the most important elements. Some people prefer thin tree branches collected outdoors because they create an earthy, organic look. Others use craft sticks purchased from hobby stores for a cleaner finish. Both options work beautifully, so the choice mostly depends on the style you want your dream catcher to have.
Flexible branches are often easier to shape into circles. Willow branches, grapevine, and other bendable twigs tend to work especially well. However, if the sticks are stiff, you can still create a frame by tying several together into a circular shape with yarn or string.
Meanwhile, yarn becomes the heart of the design. Thick yarn creates a cozy and textured appearance, while thinner yarn gives the webbing a more delicate finish. Neutral shades such as cream, beige, brown, and white fit beautifully into soft lifestyle-inspired decor. On the other hand, colorful yarn can make the dream catcher feel playful and artistic.
In addition, many people enjoy mixing different yarn textures together. Combining chunky yarn with thinner strands often adds depth and personality. Even leftover yarn scraps from previous projects can become useful here, which makes this craft wonderfully budget-friendly.
You may also want decorative details for How to Create a Dream Catcher such as:
- Wooden beads
- Feathers
- Lace ribbons
- Fabric strips
- Small artificial flowers
- Crystals
- Shells
- Tassels
- Bells
- Twine
These additions are optional, yet they can completely transform the final look. For instance, feathers add softness and movement, while beads bring texture and visual interest to the woven center.
Scissors are also necessary, along with glue if you plan to secure certain decorations firmly. Some crafters use hot glue guns for stronger attachment, although simple craft glue can work for lightweight materials.
Another helpful tip is preparing a workspace beforehand. Dream catcher crafting involves wrapping, tying, and trimming yarn repeatedly, so having enough room prevents frustration later. A clean table, good lighting, and a relaxing environment can make the entire experience feel more peaceful and enjoyable.
At this stage, it is also helpful to think about where the dream catcher will eventually hang. A nursery might inspire softer pastel colors and delicate ribbons. Meanwhile, a boho bedroom may look beautiful with earthy neutrals and natural wood beads. Thinking ahead about placement can guide your material choices naturally.
Most importantly, remember that perfection is not necessary. Handmade dream catchers often look best when they feel slightly imperfect and personal. Tiny irregularities in the weaving or wrapping usually add charm rather than taking away from it.
Step 2. Create the Circular Frame Using Flexible Sticks or Branches

Once your materials are ready, the next step involves building the circular base of the dream catcher. This frame becomes the foundation for everything else, so taking your time here makes the later steps much easier.
If you are using flexible branches, begin by gently bending them into a circle. Move slowly during this part because dry branches can snap if handled roughly. Sometimes lightly dampening the branches with water helps them bend more smoothly without breaking.
After shaping the circle, overlap the ends slightly and secure them tightly using yarn, twine, or string. Wrap the binding material several times around the overlapping area to keep the frame stable. A loose frame can shift later while weaving the center, so it helps to make the structure firm from the beginning.
For larger dream catchers, you may need to combine multiple branches together. Wrapping additional sticks around the frame can also create a thicker and more rustic appearance, which looks especially beautiful in cozy bedroom decor.
Meanwhile, if you are using straight craft sticks instead of bendable branches, you can arrange several into a rough circular shape and tie them together securely. This style often creates a more handmade and artistic appearance rather than a perfectly smooth circle.
Once the frame feels secure, many people choose to wrap yarn around the entire ring. Although this step takes a little patience, it makes a huge visual difference. Bare sticks look lovely on their own, yet wrapped yarn creates a softer and more finished appearance.
To wrap the frame for this How to Create a Dream Catcher;
Tie the yarn securely onto one section of the circle and begin looping it tightly around the entire ring. Keep the wraps close together so the sticks underneath remain mostly hidden. Some people prefer neat wrapping, while others intentionally leave small gaps for a more rustic effect.
Additionally, changing yarn colors while wrapping can create beautiful layered designs. For example, alternating cream and brown yarn gives the dream catcher a warm earthy look. Likewise, soft blush and ivory combinations create a gentler feminine aesthetic.
This part of the project can feel surprisingly calming. Repetitive wrapping motions often create a slow rhythm that turns crafting into something relaxing rather than stressful. Instead of rushing through it, many people enjoy taking their time and treating the process almost like quiet meditation.
If the yarn starts slipping while wrapping, a small dot of glue underneath can help keep everything secure. However, tying occasional knots discreetly around the frame usually works just as well.
As the circle becomes fully covered, the dream catcher already starts taking shape visually. Even before the center weaving begins, the wrapped frame alone can look beautiful hanging near natural light.
By the end of this step, you should have a sturdy circular frame that feels secure in your hands and reflects the overall style you want your dream catcher to have.
Step 3. Weave the Yarn Web Carefully Through the Center of the Frame
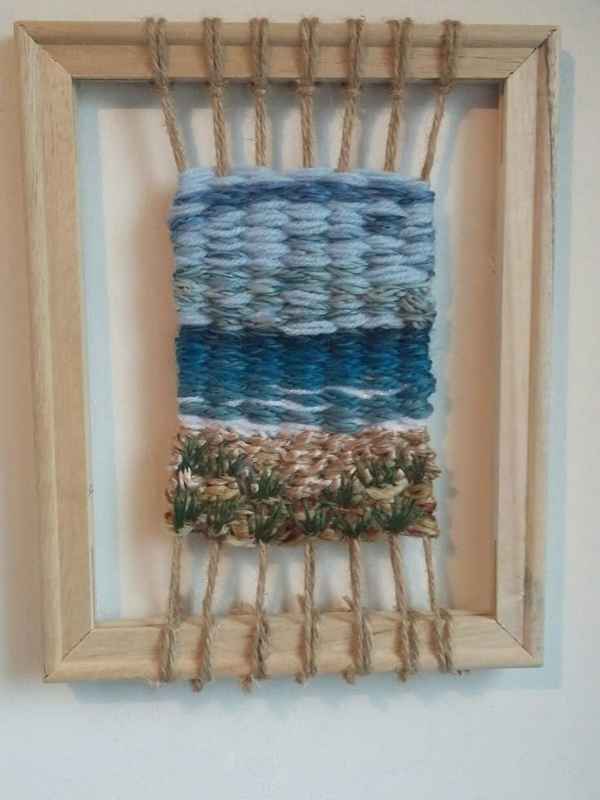
The woven center is often the most recognizable part of a dream catcher. Although it may look complicated initially, the process becomes much easier once you begin repeating the pattern slowly.
Start by cutting a long piece of thinner yarn or string for the web. Tie one end securely onto the frame. Then loop the yarn around the ring several inches away and pull it through to create the first section of the web.
Continue making evenly spaced loops all around the circle. These loops form the outer layer of the web, so spacing them carefully helps the final design look balanced. However, exact measurements are not necessary. Slight irregularities often make handmade dream catchers feel more charming and authentic.
Once the first round is complete, begin weaving the yarn through the middle of each loop instead of around the frame itself. Gradually, the web will start forming naturally toward the center.
Meanwhile, maintaining gentle tension is important during this step. Pulling the yarn too tightly may warp the circular frame, while leaving it too loose can make the web sag. A balanced tension creates the best result.
As the weaving continues inward, you can add beads onto the yarn for extra detail. Wooden beads especially complement rustic yarn-and-stick dream catchers beautifully. Slide beads onto the yarn before threading it through the next loop to incorporate them naturally into the web.
Some people prefer tightly woven centers with many layers. Others enjoy more open designs with wider spacing. Both approaches look lovely, so the choice depends on your personal style.
Additionally, this stage on How to Create a Dream Catcher allows plenty of room for creativity. You can experiment with:
- Multiple yarn colors
- Spiral weaving patterns
- Layered webs
- Beaded sections
- Uneven rustic weaving
- Minimal open centers
There is no single correct way to design the web. That freedom is part of what makes dream catcher crafting feel artistic instead of rigid.
As you approach the center, the loops naturally become smaller. Eventually, you will reach a tiny middle opening. Tie the yarn securely there and trim any excess carefully.
At this point, the dream catcher already looks complete structurally. Nevertheless, decorative elements will add softness, movement, and personality in the next stage.
Step 4. Add Hanging Yarn, Feathers, and Decorative Details for Texture
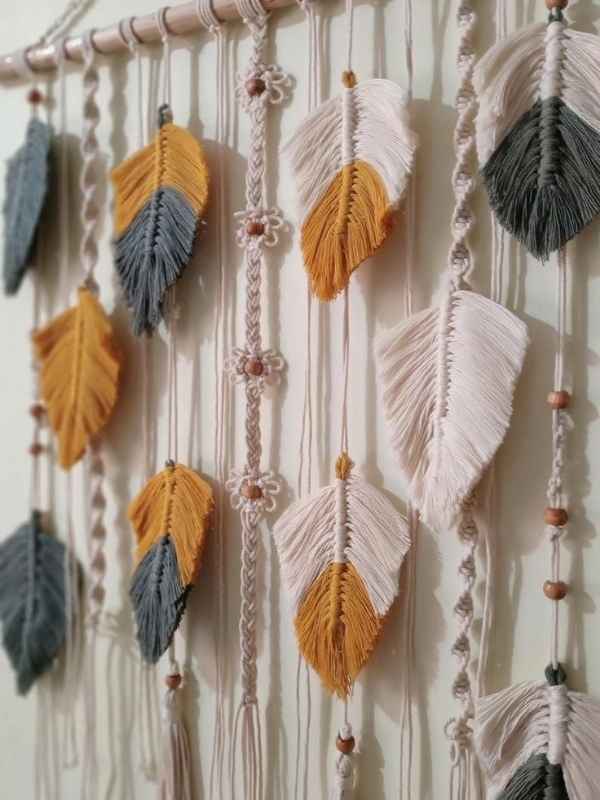
Once the woven center is finished, the decorating stage begins. This is often the most enjoyable part because the dream catcher starts transforming from a simple craft into a meaningful decorative piece.
Start by cutting several strands of yarn in varying lengths. Tie them onto the bottom section of the frame so they hang downward. Mixing long and short strands usually creates a softer and more layered appearance.
Meanwhile, braided yarn strands can add beautiful texture. Some people braid three pieces together while leaving others loose for variety. Tassels also work beautifully here and create extra movement when the dream catcher hangs near a window or fan.
Feathers are another classic addition. They bring softness and flow while enhancing the dreamy aesthetic many people associate with dream catchers. Natural-colored feathers pair especially well with earthy yarn tones and wooden beads.
To attach feathers:
Tie them directly onto hanging yarn strands or secure them using beads. Sliding beads over the feather ends can make the design look more polished while also helping keep everything in place.
In addition, ribbons and lace can create a softer feminine style that fits beautifully into cozy bedroom decor. Mixing delicate lace with rustic sticks often creates a balanced contrast that feels elegant without looking overly decorative.
For people who enjoy nature-inspired designs, adding small shells, crystals, or dried flowers can make the dream catcher feel even more personal. Tiny details like these often become conversation pieces later because they give the project individuality.
Another creative option involves wrapping fairy lights around larger dream catchers. Soft warm lights woven carefully through the frame can create a calming nighttime glow inside bedrooms or reading corners.
As you decorate, stepping back occasionally helps you see the overall balance of the design. Sometimes adding too many elements can overwhelm the softness of the piece. Therefore, spacing decorations thoughtfully usually creates the prettiest final result.
At the same time, personal preference matters most. Some dream catchers look stunning with minimal detail, while others become beautiful through layered textures and bold decorative combinations.
Because this project is handmade, imperfections often add warmth rather than taking away from the final appearance. Slightly uneven hanging strands or asymmetrical details can make the dream catcher feel authentic and full of personality.
Step 5. Find the Perfect Place to Hang Your Handmade Dream Catcher
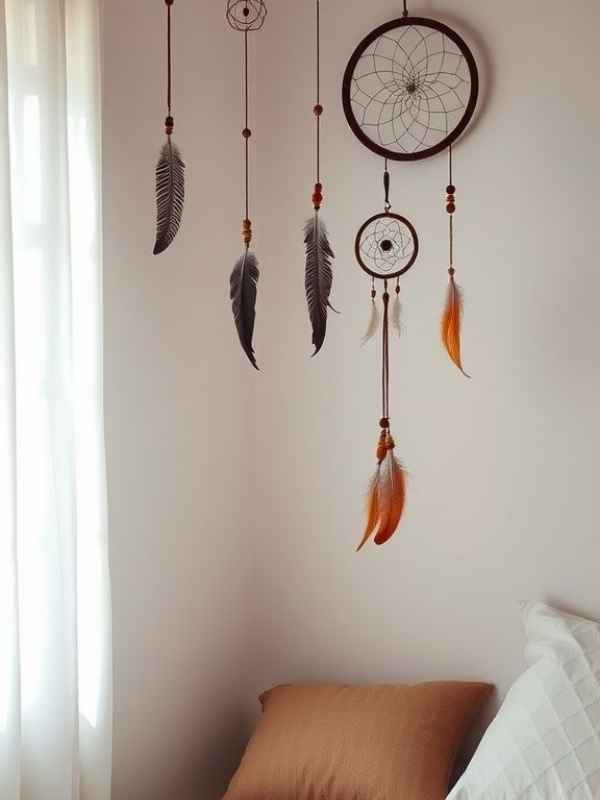
After spending time crafting every detail, choosing where to display the dream catcher becomes part of the experience too. Placement can completely change the atmosphere of a room and help the handmade piece feel even more special.
Bedrooms are the most traditional choice. Hanging a dream catcher above the bed instantly creates a softer and more peaceful feeling within the space. Meanwhile, placing it near a window allows the feathers and yarn strands to move gently whenever air flows through the room.
Nurseries;
Also look especially beautiful with handmade dream catchers. Soft yarn textures and calming neutral colors can create a cozy environment that feels warm and comforting. However, it is important to hang decorative pieces securely and safely away from small children.
Reading corners are another lovely option. A dream catcher hanging beside bookshelves, woven blankets, and soft lighting can make the entire space feel more relaxing and personal.
Additionally, some people use dream catchers as seasonal decor during autumn because the earthy textures pair naturally with cozy interiors, candles, and layered fabrics. Rustic stick frames especially complement fall-inspired home styling beautifully.
Large dream catchers can also work as statement wall pieces in living rooms or creative studios. Meanwhile, smaller versions look charming grouped together in sets of two or three.
If you enjoy outdoor spaces, covered patios or balconies can become beautiful locations too. However, outdoor weather may damage delicate yarn and feathers over time, so sheltered areas work best.
Another thoughtful idea is giving handmade dream catchers as gifts. Because they require time and care to create, they often feel far more meaningful than store-bought decorations. Friends and family members usually appreciate handmade gifts because they carry personal effort and creativity.
Furthermore, each dream catcher tells its own quiet story through the chosen colors, textures, and details. Some feel earthy and grounded. Others feel playful and whimsical. Either way, the handmade quality gives them warmth that mass-produced decor rarely achieves.
Over time, your dream catcher may even become one of those small comforting pieces in your home that simply feels familiar and calming whenever you notice it hanging nearby.
Step 6. Experiment With Different Dream Catcher Styles and Creative Variations

After making one dream catcher, many people quickly realize how addictive the process can become. The possibilities feel almost endless because small changes in materials or weaving styles can create completely different results every time.
One popular variation involves using thicker chunky yarn for a cozier appearance. This style works beautifully in farmhouse-inspired or soft neutral bedrooms because the texture instantly makes the space feel warmer and more inviting.
Meanwhile, minimalist dream catchers have become increasingly popular in modern decor. These versions often feature simple neutral yarn, clean weaving patterns, and very few decorative additions. Even with minimal detail, they still create a calming and elegant atmosphere.
For a more bohemian style:
Layering multiple rings together can create a dramatic effect. Some people attach smaller dream catchers beneath larger ones using hanging yarn strands, creating a cascading design that looks beautiful against blank walls.
Additionally, moon-shaped dream catchers offer a unique twist on the traditional circular frame. Instead of bending sticks into a circle, branches can be shaped into crescent moons and wrapped with yarn for a softer celestial-inspired look.
Color experimentation can completely transform the mood as well. Soft creams and browns create earthy warmth, whereas pastel yarns feel dreamy and feminine. Bright rainbow shades, on the other hand, create playful artistic energy perfect for creative spaces.
Seasonal themes are another fun direction to explore. Autumn dream catchers may include dried leaves and warm rust-colored yarn. Winter versions often feature white feathers and silver beads. Spring-inspired designs can include floral accents and lighter textures.
Furthermore, incorporating meaningful charms or keepsakes into the design makes the dream catcher feel deeply personal. Tiny photographs, heirloom beads, handwritten notes folded into miniature charms, or sentimental fabric scraps can quietly turn the craft into something emotionally valuable.
Children also enjoy making simpler dream catcher versions using colorful yarn and lightweight decorations. Crafting together can become a memorable bonding activity that encourages creativity while creating handmade decor for their rooms.
Because the process is flexible, mistakes rarely ruin the final result. In fact, unexpected details often become the most beautiful parts of handmade projects. A slightly uneven weave or asymmetrical feather placement can add character that makes the dream catcher feel unique.
Eventually, many people begin creating dream catchers not just for decoration but because the process itself becomes calming and therapeutic. Repetitive weaving motions, soft textures, and creative freedom can feel wonderfully grounding during stressful seasons of life.
Step 7. Learn Simple Tips That Make the Entire Crafting Process Easier

Although dream catchers are beginner-friendly crafts, a few practical tips can make the experience much smoother and more enjoyable from start to finish.
One helpful trick is securing the frame tightly before beginning any weaving. Loose frames tend to shift constantly while wrapping yarn, which can quickly become frustrating. Therefore, spending extra time stabilizing the circle early usually saves effort later.
Another useful tip involves choosing yarn carefully. Extremely fuzzy yarn may look beautiful, but it can sometimes make intricate web weaving difficult because the loops become harder to see clearly. Smooth yarn often works better for beginners.
Meanwhile, working slowly during the center weaving stage helps maintain even tension. Rushing usually leads to tangled yarn or uneven spacing. Since this craft is naturally calming, approaching it patiently often creates better results anyway.
If your yarn twists repeatedly while weaving, letting the strand dangle occasionally can help untwist it naturally. Small adjustments like this make the process feel much less frustrating.
In addition, keeping scissors nearby throughout the project helps avoid unnecessary interruptions. Many people underestimate how often trimming yarn ends becomes necessary during crafting.
Lighting;
Matters more than expected. Good natural lighting makes weaving patterns easier to follow, especially when using thinner yarn or delicate string.
For larger dream catchers, using clips or clothespins can help hold hanging decorations temporarily while arranging the design. This allows you to experiment with placement before tying everything permanently.
Storage is another thing worth considering if you plan to make several dream catchers. Keeping yarn organized in baskets or containers prevents tangling and makes future projects feel easier to start.
Moreover, inspiration can come from almost anywhere. Nature walks, cozy bedroom decor, Pinterest boards, vintage markets, and seasonal color palettes can all spark new design ideas.
At the same time, comparing your work too heavily to perfectly styled online images can remove the joy from crafting. Handmade pieces are supposed to feel personal. Small imperfections often become the details that make them memorable.
Most importantly, allowing yourself to enjoy the process matters just as much as the final result. Crafting does not always need to be productive or perfect to feel meaningful. Sometimes the quiet act of making something slowly with your hands is valuable on its own.
FAQs About How to Create a Dream Catcher
1. What kind of yarn works best for this How to Create a Dream Catcher?
Soft acrylic yarn, cotton yarn, and chunky textured yarn all work beautifully for dream catchers. Thinner yarn usually works best for weaving the center web, while thicker yarn creates a cozy wrapped frame.
2. Can I make a dream catcher without feathers?
Yes, absolutely. Many people prefer minimalist dream catchers without feathers. Tassels, ribbons, lace, beads, or fabric strips can create beautiful alternatives.
3. How do I keep the dream catcher frame from breaking?
Using flexible branches and wrapping them tightly with yarn or twine helps create a stable frame. Dampening dry branches slightly before bending can also prevent snapping.
4. Are dream catchers difficult for beginners to make?
Not at all. Dream catchers are beginner-friendly crafts because the weaving pattern becomes repetitive and easy to follow after a few loops.
5. Where should I hang a handmade dream catcher?
Bedrooms, reading corners, nurseries, and cozy living spaces are all beautiful places to display handmade dream catchers. Hanging them near windows can create gentle movement from airflow.
Conclusion
How to Create a Dream Catcher with yarn and sticks is one of those simple projects that turns ordinary materials into something unexpectedly beautiful. A few branches, soft strands of yarn, and quiet creative time can become a decorative piece filled with warmth and personality.
Unlike rushed purchases or temporary trends, handmade decor often carries a different feeling inside a home. It reflects patience, creativity, and personal expression in ways mass-produced items rarely can. Every wrapped section of yarn and every woven loop adds character that makes the dream catcher uniquely yours.
Meanwhile, the process itself can feel deeply calming. Sitting quietly while weaving patterns through the frame creates a slower rhythm that many people miss in everyday life. Even after the craft is finished, the dream catcher continues bringing softness and texture into the room where it hangs.
Whether you prefer rustic neutrals, layered bohemian details, delicate lace accents, or colorful playful designs, dream catchers leave plenty of room for creativity. No two ever turn out exactly alike, which is part of what makes them so meaningful.
Most of all, this project reminds us that beautiful things do not always require expensive materials or complicated techniques. Sometimes the loveliest home pieces begin with simple supplies, patient hands, and the willingness to create something slowly and intentionally.
Check out our:
18 Small Space Organization Hacks That Actually Work
10 DIY Vent Hood Cover Ideas for a Beautiful Kitchen Upgrade