Christmas Craft Ornaments: 20 Easy DIY Christmas Ornaments You Can Make in an Afternoon
Disclosure: Some of the links in this post are affiliate links. This means if you click on the link and purchase an item, I will receive an affiliate commission at no extra cost to you. All opinions remain my own. I only recommend products or services I believe will add value to my readers.
Christmas decorating can become expensive surprisingly quickly. You buy a few baubles, add some ribbons, pick up a new tree topper, and before you know it, your decorating budget has disappeared. I remember how tempting it can be to recreate those beautifully decorated Christmas trees you see on Pinterest, especially when every ornament seems to have its own special charm. However, you don’t have to purchase everything to achieve a beautiful holiday display. These Christmas craft ornaments offer a lovely way to decorate your tree using simple materials, a little creativity, and things you may already have at home.
One of the best things about making homemade Christmas decorations is that you can give every piece its own personality. Perhaps you love traditional red and gold decorations, or maybe you prefer neutral colors, rustic wooden details, and soft ribbons.
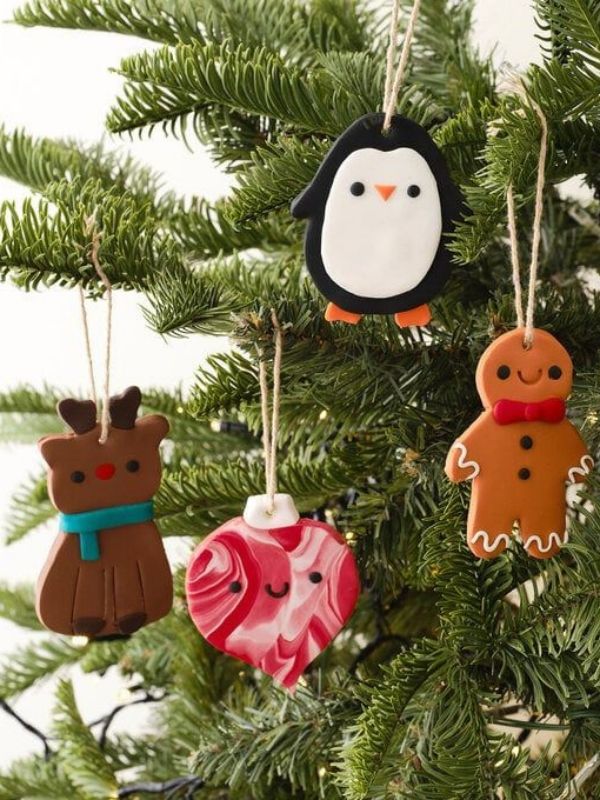
Whatever your decorating style, handmade ornaments allow you to bring those ideas together without spending too much. Better still, most of these projects are beginner-friendly and can be completed in an afternoon.
You can also turn the experience into a lovely family activity. Imagine spreading craft supplies across the dining table, playing Christmas music, and letting everyone create an ornament for the tree. Some pieces might look perfectly polished, while others might have slightly uneven edges or unexpected color combinations. That is part of their charm.
If you are looking for affordable, beautiful, and creative Christmas craft ornaments, these 20 DIY ideas will give you plenty of inspiration. From cinnamon stick decorations to personalized photo ornaments, there is something for different decorating styles, skill levels, and budgets. Let’s get into the ideas.
You may also find helpful
20 Valentine’s Day Crafts for Kids to Make at Home or School
30 Simple Christmas Nail Ideas for Women
20 Easy DIY Christmas Ornaments You Can Make in an Afternoon
1. Rustic Cinnamon Stick Christmas Tree Ornaments
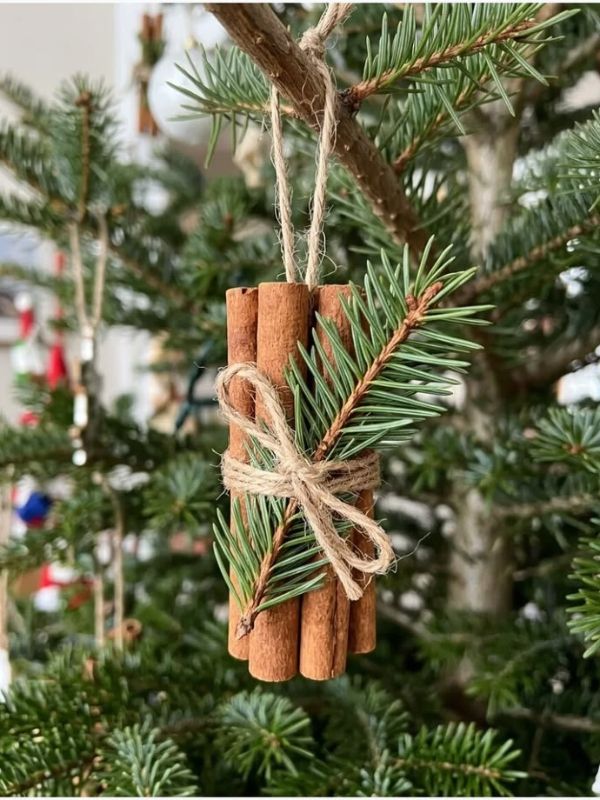
Cinnamon stick ornaments are a lovely choice when you want your Christmas tree to feel warm, natural, and a little rustic. They also bring a beautiful seasonal scent into your decorating space. Instead of purchasing expensive scented decorations, you can create these simple Christmas craft ornaments with cinnamon sticks, twine, ribbon, and a few small decorative details.
Start by gathering three cinnamon sticks for each miniature tree. Arrange them into a triangular Christmas tree shape, using one stick as the base and two shorter pieces as the branches. Alternatively, you can use several smaller cinnamon sticks arranged horizontally across one longer stick.
Once you are happy with the shape, secure the pieces together using craft glue. Allow the glue to dry completely before decorating. You can then add tiny wooden stars, miniature buttons, small artificial berries, or a little greenery to give each ornament more personality.
For the hanging loop, cut a small piece of twine and attach it to the top. A red velvet ribbon can also create a beautiful finishing touch.
What makes this project especially charming is how easily it fits into different Christmas decorating themes. For example, pair cinnamon ornaments with wooden beads and burlap ribbons for a farmhouse-inspired tree. Alternatively, use champagne ribbon and tiny gold stars for something more elegant.
These homemade Christmas tree ornaments also make thoughtful handmade gifts. You can prepare several, arrange them in a small kraft paper box, and give them to friends or relatives. They are simple, affordable, and personal without requiring complicated crafting techniques.
You may also find helpful
15 DIY Christmas Table Centerpiece Ideas
18 Christmas Porch Decorating Ideas
Christmas Buffet Table Ideas That Will Wow Your Guests
2. Clear Bauble Ornaments Filled With Faux Snow
Clear baubles are incredibly versatile because they allow you to create different designs without starting from scratch. You can fill them with miniature decorations, artificial snow, tiny greenery, or other lightweight materials. Consequently, they are among the easiest Christmas craft ornaments to personalize for your tree.
For this project, purchase clear fillable plastic baubles from a craft store. Plastic options are particularly useful when children are participating because they are less fragile than glass. You will also need faux snow, miniature bottlebrush trees, tiny decorative stars, and ribbon.
Begin by removing the top of the bauble carefully. Add a small amount of artificial snow, making sure you leave enough space for your decorative pieces. Next, insert a miniature tree or another small Christmas-themed decoration.
You can create several different designs using the same supplies. One bauble might contain a tiny evergreen tree, while another could feature a small snowman surrounded by white decorative flakes.
After arranging everything, replace the top and attach a ribbon for hanging. A little bow around the upper section can make the finished ornament look even more polished.
I particularly love this idea for anyone who enjoys coordinated Christmas decorations. You can use the same filling materials throughout your collection while changing the miniature details slightly.
For a more sophisticated appearance, keep everything within a white, silver, and champagne color palette. However, if you prefer traditional Christmas colors, red ribbons and miniature green trees will work beautifully.
These clear Christmas ornaments are also lovely for creating a small winter wonderland theme across your Christmas tree.
Save for later
35 Christmas Movie Ideas for a Cozy Holiday Movie Night
25 Unique Christmas Baby Shower Ideas
25 Cute Christmas Outfit Ideas for Women and Families
3. Personalized Photo Ornaments
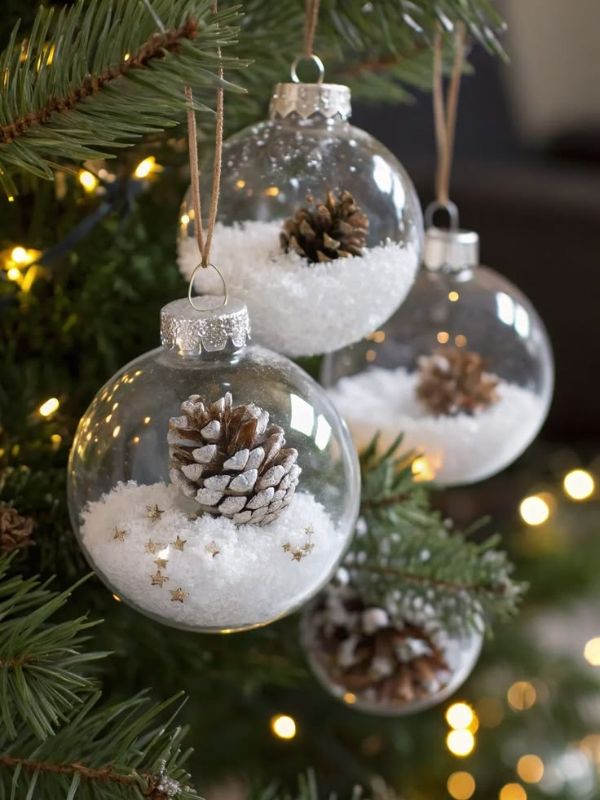
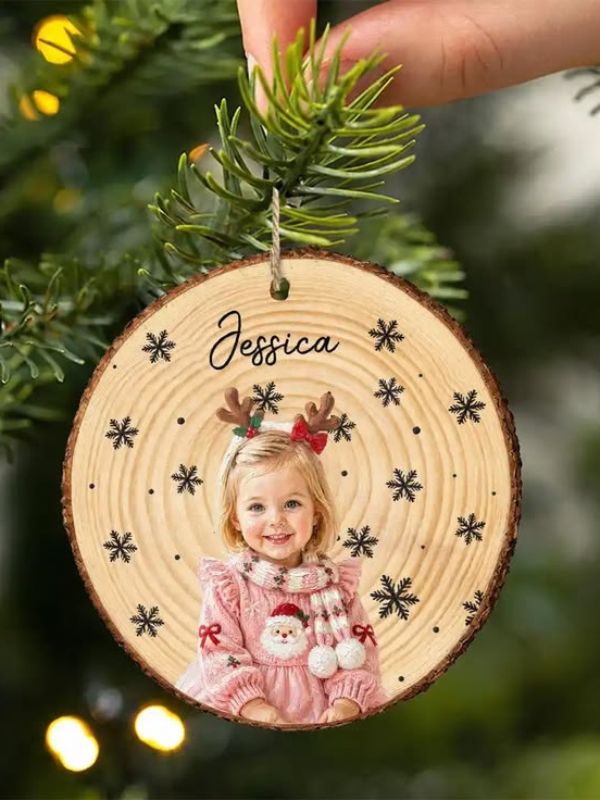
Some Christmas decorations look beautiful, but others become special because of the memories attached to them. Personalized photo ornaments fall into the second category. They allow you to turn favorite family pictures into meaningful decorations that can return to your Christmas tree every year.
To make these Christmas craft ornaments, gather small printed photographs, clear plastic ornament frames, scissors, decorative ribbon, and a few embellishments. You can also use flat wooden ornament blanks if you prefer a more rustic design.
First, select photographs that fit the size of your ornament. Family portraits, pictures from previous Christmas celebrations, memorable vacations, and special everyday moments are all wonderful choices.
Trim each photograph carefully so it fits inside the ornament frame. If you are using a clear bauble, you can roll the photograph gently and insert it through the opening. Once it settles inside, adjust it until the image faces outward.
For wooden ornaments, attach the photograph to the front using suitable craft adhesive. You can decorate the edges with tiny stars, pearl stickers, or a little ribbon.
Another lovely detail is adding the year underneath the photograph. This makes it easier to remember when the picture was taken.
These handmade Christmas decorations are especially meaningful for grandparents, parents, siblings, and close friends. You could even create a collection showing different family moments over several years.
Instead of buying another ordinary ornament, you will have something that tells a story. Every time someone notices the photograph, it creates an opportunity to remember a happy moment together.
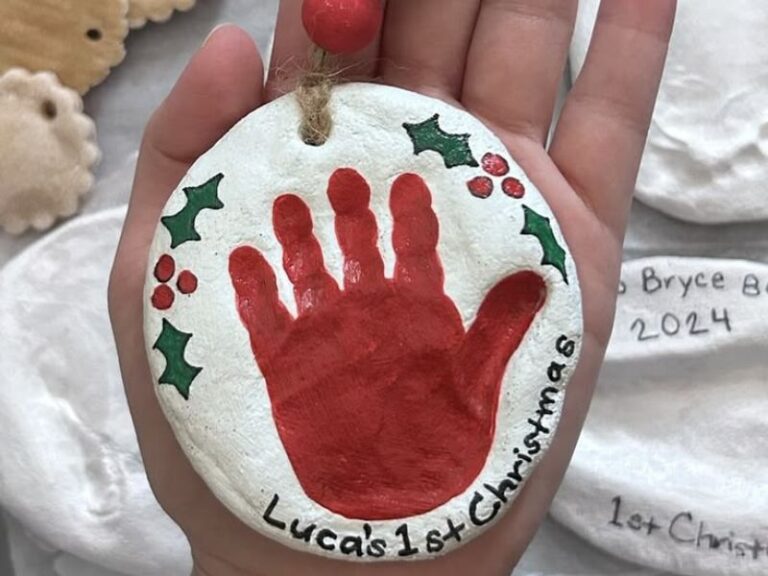
4. Salt Dough Christmas Ornament Decorations
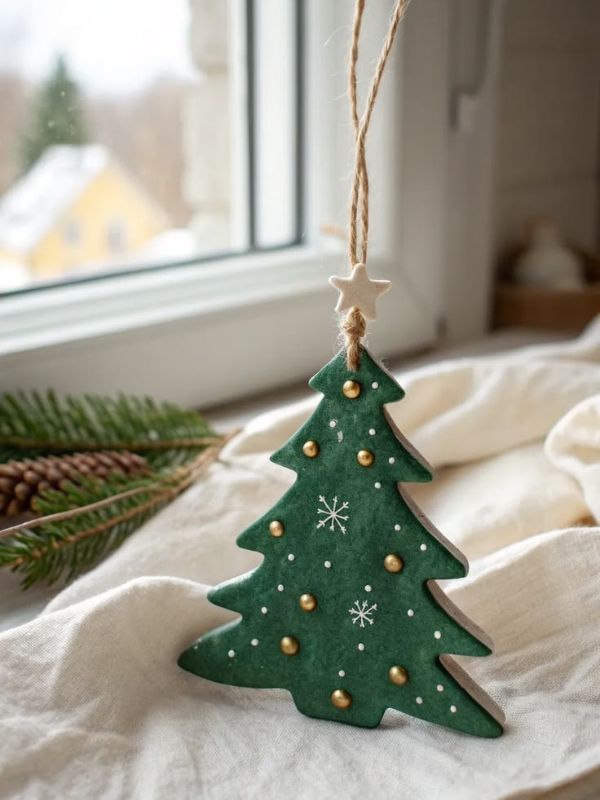
Salt dough ornaments are classic homemade Christmas decorations because they are inexpensive, customizable, and surprisingly easy to make. They are also perfect for anyone who enjoys traditional crafting activities.
You will need two cups of all-purpose flour, one cup of salt, approximately three-quarter to one cup of water, cookie cutters, and acrylic paints. You can also prepare ribbons, glitter, and decorative stamps for finishing.
Combine the flour and salt in a mixing bowl. Gradually add water while stirring until the mixture forms a firm dough. Knead it gently until the texture becomes smooth and manageable.
Next, roll the dough onto a clean surface until it is approximately a quarter-inch thick. Use Christmas-themed cookie cutters to create stars, hearts, Christmas trees, snowflakes, and gingerbread people.
Before drying the ornaments, make a small hole near the top using a straw. This opening will allow you to attach ribbon later.
The ornaments need to dry thoroughly. You can allow them to air-dry over several days or use a low-temperature oven with adult supervision. Once completely dry, paint them in your preferred colors.
White paint creates a beautiful snowy appearance, while metallic gold and silver add a more elegant finish. You can also write names or years on individual pieces.
These Christmas craft ornaments are wonderful for family crafting afternoons because everyone can choose their favorite shapes. Just remember that salt dough decorations are not edible, even though they may look like cookies.
Check out
20 Christmas Gift Baskets for Friends
15 Affordable Christmas Living Room Decor Ideas
40 Easy Thanksgiving Crafts for Kids and Adults to Make Together
5. Miniature Felt Christmas Tree Ornaments
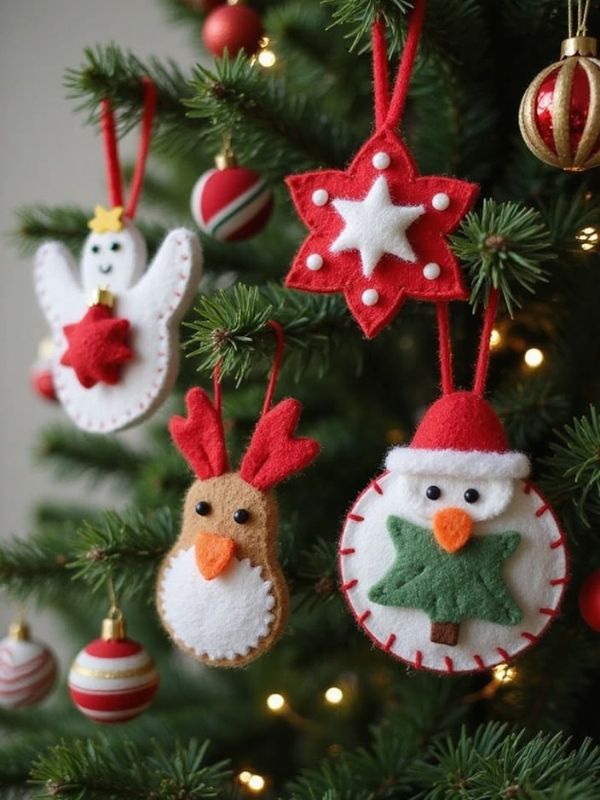
Felt ornaments are soft, colorful, and easy to customize. They also work beautifully on Christmas trees with traditional, farmhouse, Scandinavian, or playful decorating themes.
For this project, you will need colored felt sheets, scissors, fabric glue or a needle and thread, ribbon, and small decorative pieces. Green felt works perfectly for miniature trees, although you can experiment with white, burgundy, cream, or dusty pink.
Begin by drawing a simple Christmas tree outline on a piece of paper. Use it as your template and cut out two matching felt shapes for each ornament.
Place the two shapes together and secure the edges using fabric glue or simple stitching. Leave a small opening if you want to add a little soft filling inside.
Once the edges are secured, decorate the front with tiny felt circles, buttons, beads, or embroidered details. These decorations can represent Christmas lights, baubles, and little stars.
Attach a small ribbon loop at the top so the ornament can hang from a branch.
One thing I like about felt crafts is that they allow you to experiment with colors without worrying about complicated materials. You can create a collection of miniature trees in different shades and arrange them together.
For a coordinated look, choose three colors and repeat them throughout your ornaments. For example, forest green, cream, and burgundy create a traditional holiday combination.
These DIY Christmas tree ornaments are also suitable for handmade gift packages. Attach one to a wrapped present for an extra personal touch.
For more insight
25 Dog Paw Print Craft Ideas to Make Sweet Keepsakes With Your Pup
40 Fall Craft Ideas for Kids and Adults to Make This Season
30 Butterfly Craft Ideas for Kids That Are Easy and Fun
6. Dried Orange Slice Christmas Ornaments
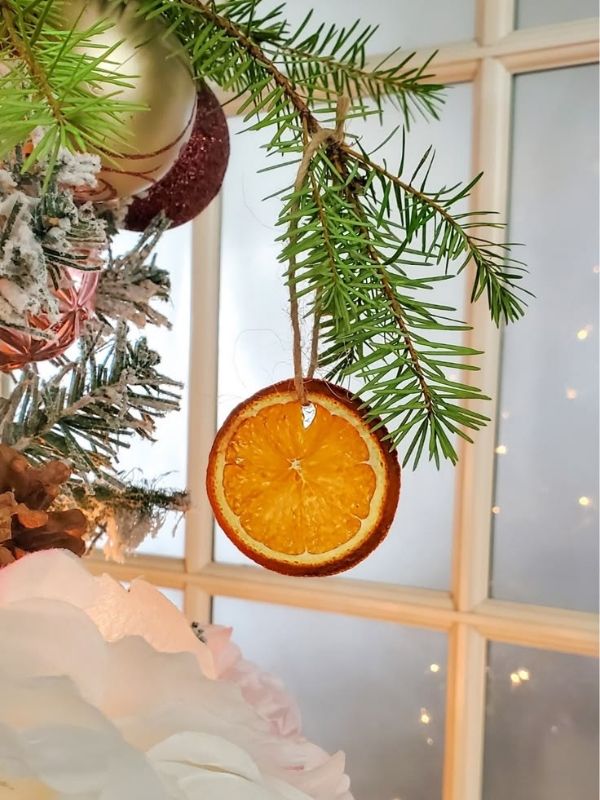
Dried orange ornaments bring natural color and a beautiful seasonal appearance to Christmas decorations. Their warm orange tones look especially attractive against green tree branches, wooden details, and neutral-colored ribbons.
You only need fresh oranges, ribbon or twine, and a baking tray for this project. A few cinnamon sticks or dried greenery can also complement the finished ornaments.
Start by washing the oranges and cutting them into thin, even slices. Remove excess moisture by gently pressing each slice between clean paper towels.
Arrange the slices on a lined baking tray, leaving enough space between them. They can be dried in a low-temperature oven with adult supervision. Check them regularly and allow enough time for the moisture to evaporate completely.
Once the slices have dried and cooled, carefully make a small opening near the top. Thread a piece of twine or narrow ribbon through it to create a hanging loop.
You can leave the orange slices plain for a natural appearance. Alternatively, combine them with small cinnamon sticks, dried greenery, or wooden beads.
These Christmas craft ornaments are particularly beautiful on rustic and farmhouse-inspired trees. They also work well when decorating wreaths, garlands, and holiday gift packages.
For a more traditional look, combine dried oranges with red velvet ribbon and green foliage. Meanwhile, natural jute twine gives the decorations a simpler, countryside-inspired appearance.
Make sure the slices are completely dry before storing them. This helps prevent moisture-related problems and keeps your handmade decorations in better condition.
Bookmark
20 Christmas Gift Baskets for Friends
10 Christmas Tree Themes for 2026
13 Christmas Charcuterie Board Ideas for Parties
7. Popsicle Stick Christmas Star Ornaments
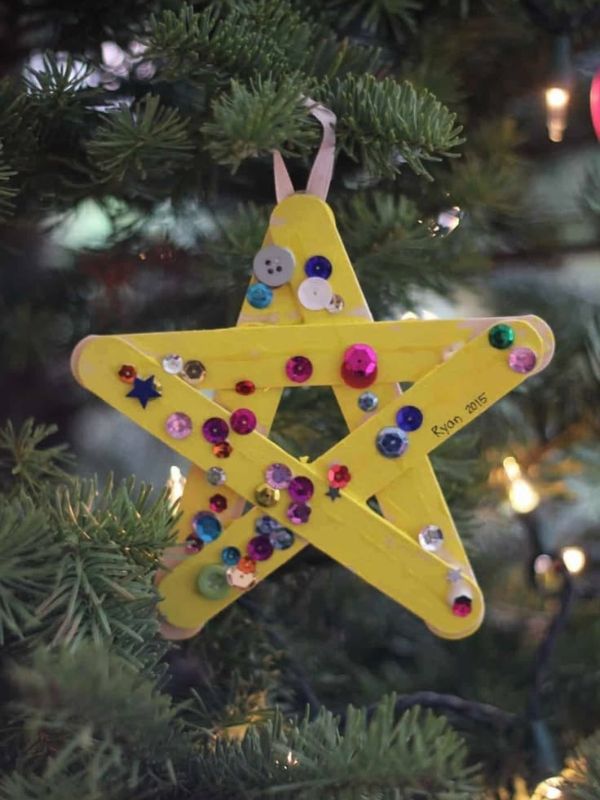
Popsicle sticks are inexpensive craft materials that can be transformed into surprisingly attractive Christmas decorations. With a little paint and some ribbon, you can create simple stars that look lovely hanging from tree branches.
For each ornament, gather five wooden popsicle sticks, craft glue, paint, decorative stars, and a hanging ribbon. You can also use small beads or glitter if you want a more detailed finish.
Arrange the sticks into a five-pointed star shape. This part may take a little adjustment because the sticks need to overlap in the correct places. Once the shape looks balanced, secure the connecting points with glue.
Allow the ornament to dry completely before painting it. White, gold, silver, and traditional red are all attractive options.
After the paint dries, add small decorative details. You could place a miniature star in the center, wrap thin ribbon around one section, or add a few tiny beads.
Attach a loop of ribbon to one of the upper points so the star can hang securely.
If you are decorating a large tree, consider making stars in different sizes. Larger pieces can become statement decorations, while smaller ones can fill empty spaces between baubles.
Another idea is to leave some stars in their natural wooden color. This creates a relaxed rustic appearance and prevents the tree from looking too colorful.
These handmade Christmas ornaments are also excellent for children working with adult assistance. However, an adult should handle any cutting or hot-glue equipment that may be needed.
8. Mini Yarn Christmas Ball Ornaments
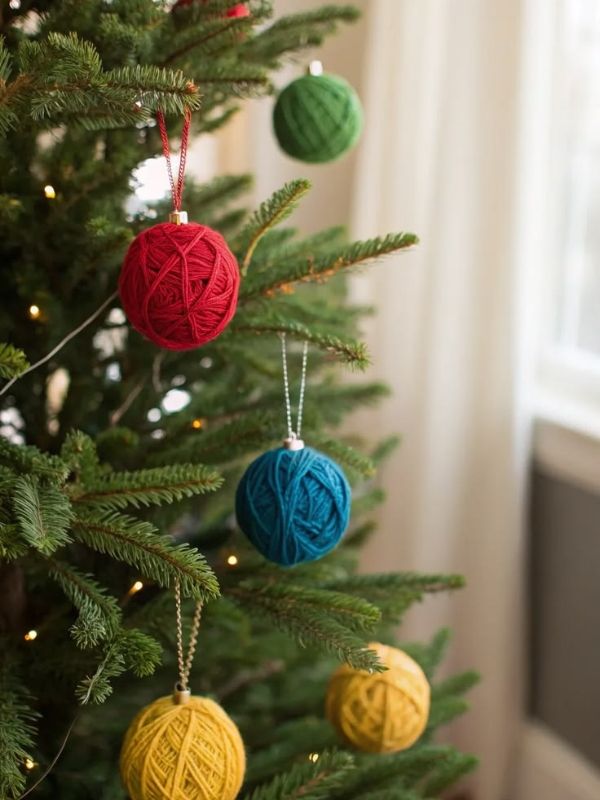
Yarn ornaments are a wonderful way to add softness and texture to your Christmas tree. They are also a practical option when you have leftover yarn from knitting, crocheting, or other craft projects.
For this design, gather yarn in your preferred colors, lightweight foam balls, craft glue, and ribbon. You can also use small decorative bells or wooden beads for additional detail.
Begin by applying a small amount of craft glue to the foam ball. Wrap the yarn around it carefully, keeping the strands close together so the original surface does not show through.
Continue wrapping until the entire ball is covered. You can use one color for a clean appearance or combine two complementary shades for a more playful design.
When you reach the end, secure the yarn with another small amount of glue. Allow everything to dry before attaching the hanging ribbon.
For a more interesting collection, experiment with different yarn textures. Chunky yarn creates a cozy appearance, while thinner yarn produces a smoother finish.
You could also add a small bow or wooden bead at the top of each ornament.
These Christmas craft ornaments are particularly suitable for neutral Christmas themes. Cream, beige, brown, and soft green yarns create a natural look that pairs beautifully with wooden decorations.
However, bright red, green, and white yarns are equally lovely for a traditional Christmas tree.
If you have several leftover yarn colors, this project is an easy way to turn small craft supplies into decorations you can reuse.
9. Mini Pinecone Christmas Tree Ornaments
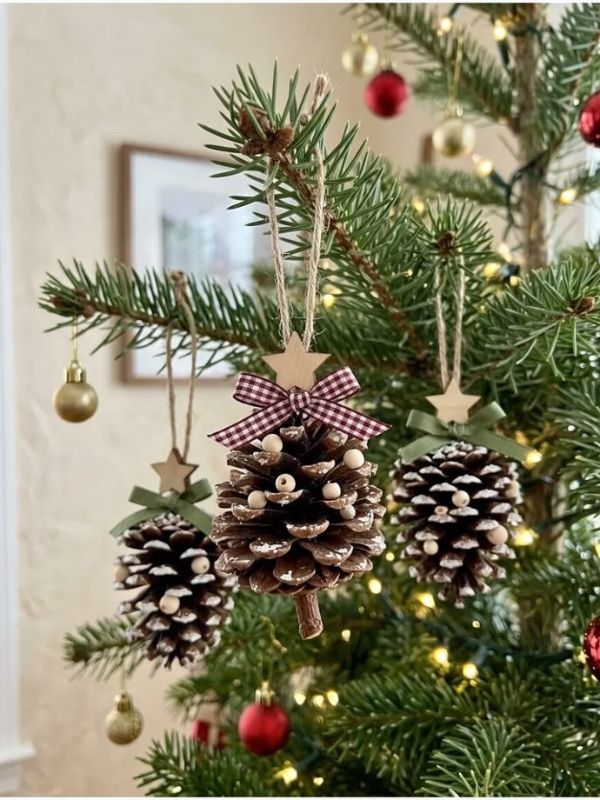
Pinecones have a naturally festive appearance, which makes them excellent materials for homemade Christmas decorations. Their interesting shape and texture also mean that they do not require much additional decoration to look attractive.
For this project, gather clean, completely dry pinecones, small ribbons, lightweight artificial greenery, and craft glue. You can also prepare white paint and tiny decorative berries.
Begin by inspecting the pinecones and removing loose dirt or debris. Make sure they are clean and dry before using them.
If you want a snowy appearance, lightly brush the outer edges with white paint. You do not need to cover the entire pinecone. A little white detailing creates a more natural winter-inspired effect.
Next, attach a small ribbon loop near the top using suitable craft adhesive. Add a miniature bow or a few decorative berries if you want extra color.
For a woodland-inspired Christmas tree, leave the pinecones mostly natural. Meanwhile, gold paint and champagne ribbon create a slightly more elegant appearance.
You can also make several variations within the same collection. Some can remain completely natural, while others feature white tips or tiny red bows.
These DIY Christmas ornaments are particularly useful when you want your decorations to feel less uniform. Their natural shapes introduce texture and make the tree look more interesting.
Just remember to inspect natural materials carefully and avoid using damaged or insect-infested pinecones.
10. Handmade Paper Snowflake Ornaments
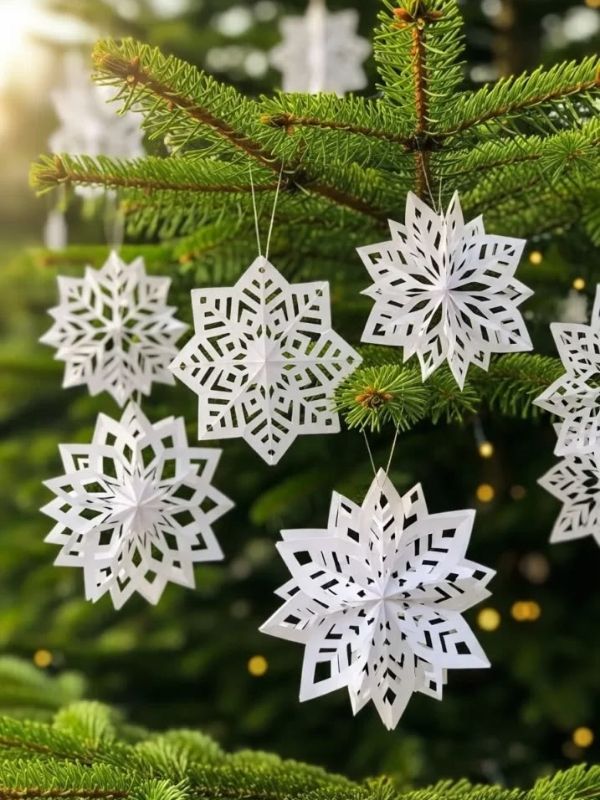
Paper snowflakes are among the easiest Christmas craft ornaments to make because they require very few materials. They are also a lovely way to create delicate decorations without spending much money.
You will need white paper, scissors, a pencil, glue, and thin ribbon. Silver paper or lightweight decorative cardstock can also create beautiful variations.
Start with a square piece of paper. Fold it diagonally to create a triangle, then fold it again into a smaller triangle. Continue folding carefully until you have a compact shape.
Use scissors to cut small patterns along the folded edges. You can create triangles, curves, tiny circles, or more detailed designs depending on your preferred style.
When you unfold the paper, you will reveal a unique snowflake pattern.
Repeat the process using different cutting patterns so every snowflake looks slightly different. You can also layer two smaller snowflakes to create a fuller decoration.
For extra detail, add a little silver glitter or use metallic paper. Attach a ribbon loop at the top and allow any glue to dry before hanging.
I especially like these decorations for trees that need a little more visual balance. Their light appearance works beautifully between heavier baubles and larger ornaments.
You can also use the same snowflakes on windows, gift bags, and holiday garlands.
If you are making them with younger children, prepare simple folding patterns and let them choose the shapes they want to cut with adult supervision.
11. Rustic Wooden Slice Christmas Ornaments
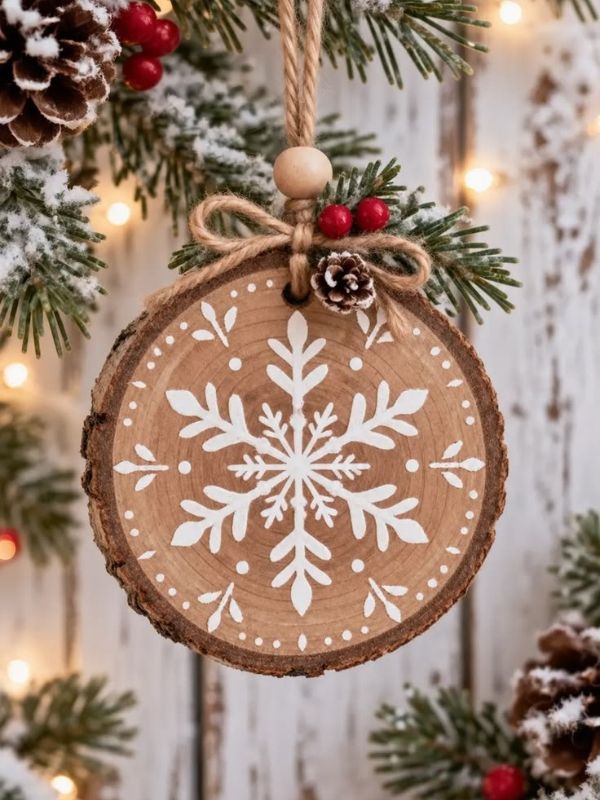
Wooden slice ornaments have a timeless appearance that works beautifully with natural Christmas decorations. They are especially attractive if you enjoy farmhouse-inspired interiors, woodland themes, or simple Scandinavian holiday styling.
For this project, you will need lightweight wooden slices with pre-drilled holes, acrylic paint, ribbon, and decorative markers. You can also use small stencils to create more consistent designs.
Begin by wiping the wooden surfaces clean. If necessary, lightly smooth any rough edges with adult assistance.
Next, decide what design you want to create. Popular choices include miniature Christmas trees, snowflakes, stars, reindeer, and simple holiday messages.
Paint your chosen design onto the wooden surface. For a minimalist look, use white paint against the natural wood. Alternatively, red and green details create a more traditional appearance.
Once the paint has dried, add small decorative details using a fine paintbrush or marker.
Thread ribbon or twine through the hole and tie it securely.
One advantage of wooden ornaments is that they are easy to personalize. You can write family names, add the year, or create a small collection featuring everyone’s favorite Christmas symbols.
These Christmas craft ornaments also make lovely keepsakes because they can be reused year after year.
If you prefer a more polished appearance, finish the wooden surface with a suitable protective coating. Follow the product instructions and allow it to dry completely before decorating your tree.
12. DIY Ribbon Bow Christmas Tree Ornaments
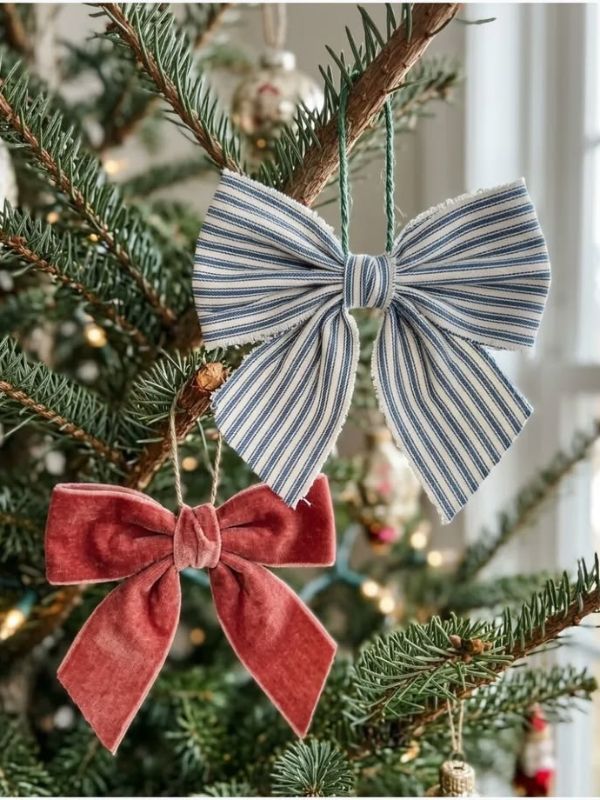
Ribbon bows are simple, elegant, and surprisingly versatile. They can make an ordinary Christmas tree feel more coordinated, especially when you repeat the same ribbon throughout your decorating theme.
For this project, gather satin ribbon, velvet ribbon, wired ribbon, scissors, and small pieces of craft wire or suitable ribbon fasteners.
Begin by deciding how large you want each bow to be. Cut equal lengths of ribbon and form two loops, bringing the center together neatly.
Secure the middle using a small piece of ribbon or an appropriate fastener. Adjust the loops until they look balanced.
For a fuller bow, you can add another layer of ribbon underneath the first one. This creates a more dimensional decoration without requiring complicated techniques.
Attach a small hanging loop to the back so the bow can sit comfortably on a tree branch.
Color selection makes a noticeable difference here. Burgundy velvet creates a rich traditional appearance, while champagne satin looks soft and elegant.
You can also combine different textures. For example, a narrow gold ribbon wrapped around a wider cream bow creates a beautiful layered effect.
These homemade Christmas tree ornaments are particularly helpful when you want to fill spaces between larger decorations.
They can also be attached to wreaths, garlands, gift packages, and decorative baskets.
Rather than purchasing multiple expensive statement ornaments, you can use coordinated bows to create a consistent look across your entire Christmas decorating scheme.
13. Beaded Candy Cane Christmas Ornaments
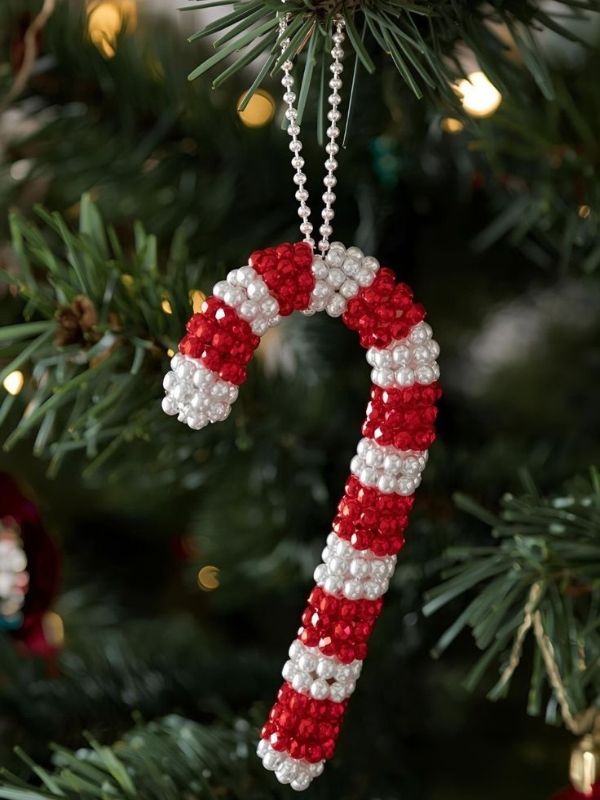
Candy cane decorations bring a playful touch to Christmas trees, and beaded versions are easy to customize using inexpensive craft materials.
You will need pipe cleaners, red and white beads, scissors, and small ribbon pieces. Choose beads with holes large enough to fit comfortably over the pipe cleaner.
Start by cutting a pipe cleaner to your preferred ornament size. Bend one end slightly so the beads do not slide off while you work.
Next, alternate red and white beads along the pipe cleaner. Continue until you have covered most of its length.
Once the beads are in place, secure the remaining end and gently bend the entire piece into a candy cane shape.
You can make the decorations in different sizes depending on where you plan to hang them. Smaller versions look lovely between traditional baubles, while larger ones can become noticeable accent pieces.
If you want a more coordinated appearance, use beads in cream and burgundy instead of the traditional red and white combination.
Another option is to create miniature candy canes in several colors and place them together in a decorative bowl before hanging them on the tree.
These Christmas craft ornaments are particularly suitable for family crafting afternoons because the pattern is simple to understand.
However, small beads can present a choking risk for young children, so keep them away from toddlers and supervise children throughout the activity.
14. Miniature Gift Box Christmas Ornaments

Tiny gift boxes are adorable Christmas tree decorations because they resemble miniature presents hanging among the branches. They are also a creative way to use leftover wrapping paper and ribbon.
For this project, gather small empty cardboard boxes, wrapping paper, scissors, craft glue, and decorative ribbon. You can use small jewelry boxes or make your own using lightweight cardboard.
Begin by choosing a few wrapping paper designs that complement your Christmas color palette. Cut the paper into pieces large enough to cover each box.
Wrap the boxes carefully, securing the edges with craft glue. Smooth the paper gently to prevent unnecessary wrinkles.
Once the boxes are covered, tie a narrow ribbon around each one just as you would wrap a real present. Finish with a small bow on top.
You can make the collection more interesting by using different wrapping paper patterns. For example, combine gold stripes, traditional red patterns, and simple cream paper.
To turn the miniature presents into hanging ornaments, attach a small ribbon loop to the top or back.
These handmade Christmas decorations are especially lovely when placed on a tree with a gift-inspired theme.
They also work well as decorative accents on garlands and wreaths.
One small detail that makes a difference is choosing lightweight boxes. Heavy decorations can pull down delicate branches, so keep the finished pieces compact and easy to hang.
15. DIY Button Christmas Tree Ornaments
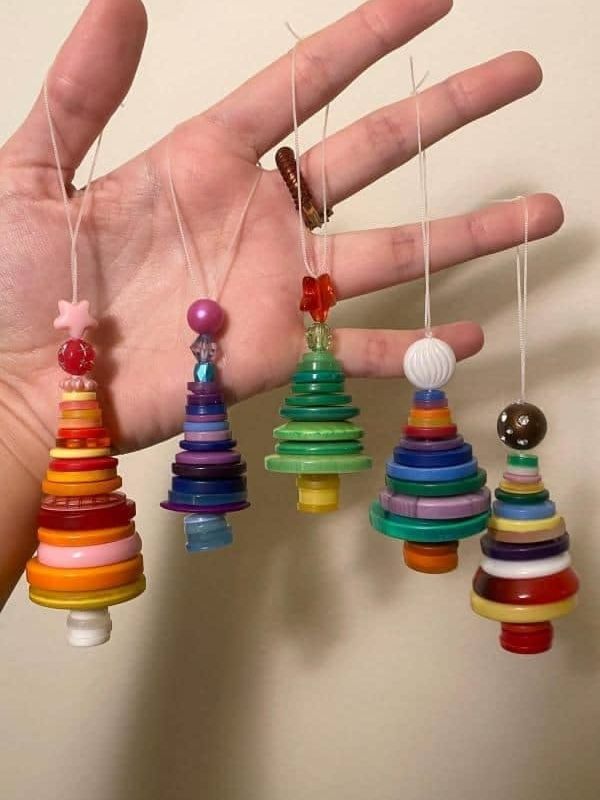
If you have a collection of spare buttons at home, this is a lovely opportunity to turn them into something decorative. Button ornaments are inexpensive, colorful, and easy to adapt to different Christmas themes.
For each ornament, gather buttons in different sizes, lightweight cardboard or felt, craft glue, ribbon, and a small decorative star.
Begin by cutting a simple Christmas tree shape from cardboard or felt. This will serve as the base for your decoration.
Arrange the buttons from largest to smallest, starting with the wider section at the bottom and gradually moving toward the top.
Once you are happy with the arrangement, attach each button using suitable craft glue. Leave small spaces between some of the buttons if you want the background to show through.
Add a tiny star at the top of the tree. You can also attach a small ribbon bow near the bottom for extra detail.
After everything has dried, attach a hanging loop to the back.
For a more elegant look, use buttons in gold, cream, silver, and white. Alternatively, red and green buttons create a cheerful traditional Christmas design.
Another creative option is to arrange buttons into snowflakes, wreaths, or simple stars instead of trees.
These Christmas craft ornaments are a practical choice when you want to reuse leftover materials rather than purchase a completely new set of supplies.
Keep loose buttons and small decorative pieces away from younger children.
16. Miniature Gingerbread House Ornaments
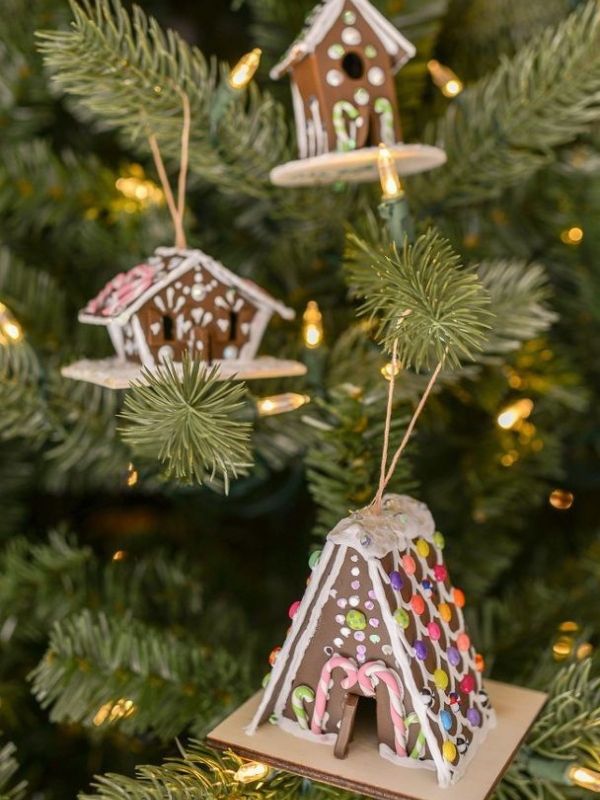
Gingerbread house ornaments bring a sweet, nostalgic appearance to Christmas trees. Although real gingerbread can be used for edible decorations, a miniature cardboard or felt version is a better option if you want something reusable.
For this project, gather brown felt or lightweight cardboard, white felt, craft glue, scissors, ribbon, and small decorative pieces.
Begin by drawing a simple house shape. Include a square base, two sloping roof sections, and a small chimney if you want additional detail.
Cut out two matching house shapes and attach them together. If you are using felt, you can add a little soft filling between the layers.
Next, decorate the front using white felt strips to represent icing. Add tiny circles or colorful pieces to represent sweets, windows, and decorative roof details.
You can also create a small door using darker brown felt.
Once the decoration is complete, attach a ribbon loop to the top.
The beauty of this idea is that you can create an entire miniature Christmas village using different house shapes and colors.
For a more traditional gingerbread appearance, stick to brown, white, and small red details. However, pastel pink, cream, and gold can create a more playful look.
These Christmas craft ornaments are particularly charming on trees with candy-inspired or vintage Christmas themes.
They also make thoughtful handmade decorations for people who enjoy whimsical holiday styling.
17. DIY Pearl and Bead Christmas Ornaments
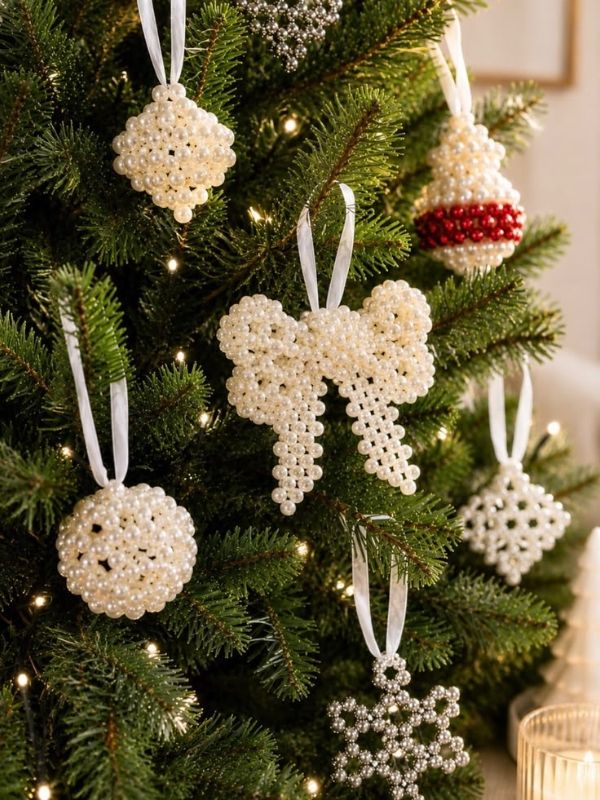
Pearl and bead ornaments are an excellent choice when you want your Christmas tree to look a little more elegant. Their delicate appearance works particularly well with champagne, white, gold, and neutral holiday decorations.
You will need lightweight ornament bases, craft pearls, beads, suitable adhesive, and ribbon. You can purchase plain baubles or use small wooden ornament shapes.
Start by deciding on your arrangement. You could cover the entire surface with small pearls or create a pattern using larger beads.
Apply the adhesive in small sections and place the pearls carefully. Working gradually makes it easier to maintain an even arrangement.
For a simpler design, create a line of pearls around the middle of a plain bauble. You can then add a small ribbon bow to complete the look.
Another option is to decorate wooden stars with pearl details around their edges.
The key is to avoid adding too many different decorative elements. Pearl ornaments already have texture and visual interest, so a few carefully placed details are often enough.
These homemade Christmas tree ornaments look particularly beautiful when combined with soft lighting and delicate ribbon garlands.
You can also create a small matching collection for a cohesive appearance.
If you are decorating a larger tree, mix pearl ornaments with plain metallic baubles to prevent the display from becoming too busy.
18. Mini Macrame Christmas Tree Ornaments
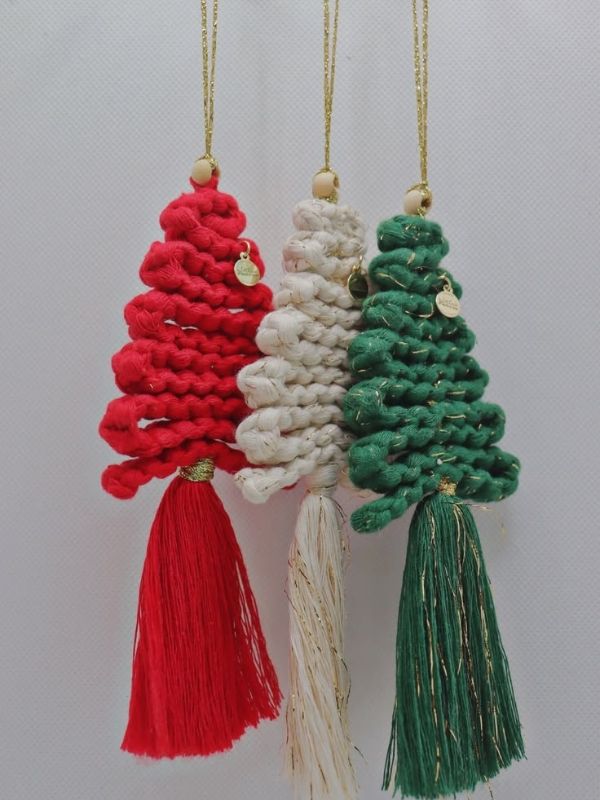
Macrame ornaments are perfect for anyone who enjoys natural textures and handmade decorations. They bring a relaxed, slightly bohemian appearance to Christmas trees while remaining simple enough for beginner-friendly crafting.
For this project, gather cotton cord, scissors, wooden beads, and small wooden rings. You can also use ribbon loops if you do not have decorative rings.
Begin by cutting several equal lengths of cotton cord. Attach them to the wooden ring using simple lark’s head knots.
Arrange the hanging strands neatly and begin tying basic square knots or other beginner-friendly macrame patterns.
As you work down the decoration, gradually adjust the knot placement to create a triangular Christmas tree shape.
Trim the ends carefully to form a neat base. Add a small wooden bead or star at the top for extra detail.
You can also brush out the lower cotton strands to create a soft, fringed appearance.
These Christmas craft ornaments look especially beautiful when left in natural cream or white. However, green cotton cord can create a more traditional miniature tree.
If you prefer a coordinated farmhouse theme, pair them with cinnamon sticks, pinecones, and wooden slice decorations.
Macrame ornaments require a little more patience than some of the other projects, but the finished result is worth the effort.
They are also lightweight, making them suitable for hanging on delicate tree branches.
19. DIY Christmas Bell Ornaments

Christmas bells are traditional decorations that bring a lovely festive touch to holiday displays. Their familiar shape makes them easy to recognize, and you can customize them to suit almost any decorating style.
For this project, gather small lightweight craft bells, ribbon, twine, decorative greenery, and small bows. You can also use cardboard or felt if you prefer a handmade bell shape.
If you are using ready-made craft bells, start by cleaning their surfaces. Choose a finish that complements your Christmas theme, such as gold, silver, or traditional red.
Thread a ribbon or piece of twine through the top and secure it into a hanging loop.
Next, add a small bow beneath the loop. A little artificial greenery or a tiny decorative berry can make the finished ornament look more detailed.
For a more creative approach, cut two bell shapes from felt or cardboard and decorate them with smaller details. Attach the pieces together and add a ribbon loop at the top.
You can also create several bells in different sizes and arrange them throughout your tree.
Gold bells pair beautifully with champagne and cream decorations, while silver versions work particularly well with white and icy blue themes.
These Christmas craft ornaments are also lovely for decorating door handles, wreaths, and holiday gift packages.
Choose lightweight materials, especially if you plan to hang several bells on the same branch.
20. Miniature Christmas Wreath Ornaments
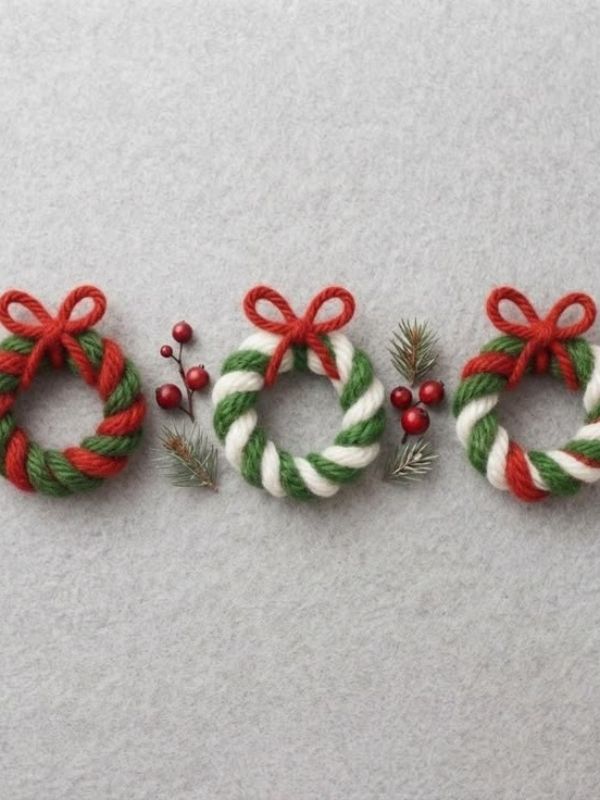
Miniature wreaths are a beautiful finishing touch for a Christmas tree. They bring the familiar appearance of traditional holiday wreaths into a smaller decorative form, making them easy to combine with other handmade ornaments.
For this project, gather small embroidery hoops or flexible craft wire, artificial greenery, ribbon, tiny decorative berries, and craft glue.
Begin by preparing a small circular base. An embroidery hoop is particularly useful because it already provides a neat shape.
Wrap the greenery around the base, securing it gradually with suitable craft adhesive or craft wire. Keep the arrangement balanced so that the wreath does not become too bulky.
Once the greenery is in place, add a few tiny decorative berries or miniature pinecones.
Finish with a small bow at the top or bottom. You can use red velvet ribbon for a traditional appearance or cream satin for something softer.
Attach a hanging loop to the back and check that the ornament sits evenly.
You can also make several miniature wreaths in different styles. Some can feature natural greenery, while others use frosted details or metallic decorations.
These Christmas craft ornaments are particularly attractive when mixed with wooden stars, dried orange slices, and simple baubles.
They are also easy to personalize by adding tiny initials or small decorative charms.
A collection of miniature wreaths can give your tree a coordinated appearance without requiring expensive decorations.
Frequently Asked Questions
1. What are the easiest Christmas craft ornaments to make at home?
Some of the easiest Christmas craft ornaments include ribbon bows, paper snowflakes, cinnamon stick trees, popsicle stick stars, and miniature gift boxes. These projects require basic materials and simple crafting techniques. You do not need advanced sewing, painting, or woodworking skills to create them.
If you are a beginner, start with paper or ribbon decorations. Once you become comfortable with the process, try salt dough ornaments, felt decorations, or personalized photo baubles. Most importantly, choose projects that match the materials you already have.
2. What materials do I need to make DIY Christmas ornaments?
The materials depend on the designs you want to create. However, some useful basics include cardstock, felt, ribbon, twine, glue, scissors, wooden beads, buttons, paint, and lightweight ornament bases.
You can also reuse materials such as cardboard packaging, leftover wrapping paper, fabric scraps, and old decorations.
Before purchasing anything, look around your home. You might already have enough supplies to complete several Christmas craft ornaments without making an additional shopping trip.
3. How can I make homemade Christmas ornaments look expensive?
The secret is choosing a consistent color palette and paying attention to small finishing details. Even inexpensive materials can look beautiful when they work together.
For example, combine cream, champagne, gold, and natural wood for an elegant Christmas tree. Use velvet ribbons, wooden beads, and simple metallic accents to create more visual interest.
Additionally, avoid overcrowding each ornament with too many decorative pieces. Clean arrangements, balanced colors, and neat finishes often create a more polished appearance than excessive embellishments.
4. Can I make Christmas craft ornaments with children?
Yes! Many Christmas craft ornaments are suitable for family crafting activities. Paper snowflakes, felt decorations, ribbon bows, and simple cardboard ornaments are particularly good options.
Children can choose colors, arrange decorations, paint wooden shapes, and personalize their creations.
However, younger children need adult supervision when using scissors, glue, small beads, and other craft materials. Adults should also handle hot-glue equipment and any heating or baking steps.
The goal is to enjoy the creative process while keeping the activity appropriate for everyone’s age and abilities.
5. How long does it take to make DIY Christmas ornaments?
Many simple ornaments take between 10 and 30 minutes to assemble. Ribbon bows, paper snowflakes, button trees, and popsicle stick stars are particularly quick projects.
Other designs may require additional drying time. For example, salt dough ornaments need to dry completely before painting, while dried orange slices require time for moisture to evaporate.
Therefore, if you want to complete several Christmas craft ornaments in one afternoon, combine quick projects with decorations that require little preparation.
6. What are the best Christmas ornament ideas for a budget-friendly tree?
Paper snowflakes, cinnamon stick decorations, cardboard gift boxes, button ornaments, and homemade ribbon bows are excellent budget-friendly options.
You can also reuse decorations from previous years and combine them with a few handmade pieces.
Rather than replacing your entire ornament collection, choose a simple theme and create decorations that complement what you already own. This approach can make your tree feel refreshed without requiring a large decorating budget.
Conclusion
Creating your own Christmas decorations does not have to be complicated or expensive. Sometimes, the most beautiful details come from simple materials, a little imagination, and the willingness to try something different. These 20 Christmas craft ornaments show how easily everyday supplies can become charming decorations for your holiday tree.
Whether you choose cinnamon stick trees, personalized photo baubles, felt decorations, or miniature wreaths, each project offers an opportunity to make your Christmas decorating more personal. You can also mix handmade pieces with your existing store-bought ornaments to create a tree that feels balanced and uniquely yours.
I particularly love the idea of making one special ornament every year. Over time, your collection becomes more than a group of decorations. It becomes a reminder of different Christmas seasons, family activities, and little moments worth remembering.
So, gather your favorite supplies, choose a few projects, and enjoy a creative afternoon. You do not need perfect crafting skills or an expensive decorating budget to make something beautiful. After all, the best Christmas decorations are often the ones that carry a little story of their own.